Tag: reactive steel

Action Target Announces Early Registration for 2011 Law Enforcement Training Camp

Law Enforcement Training

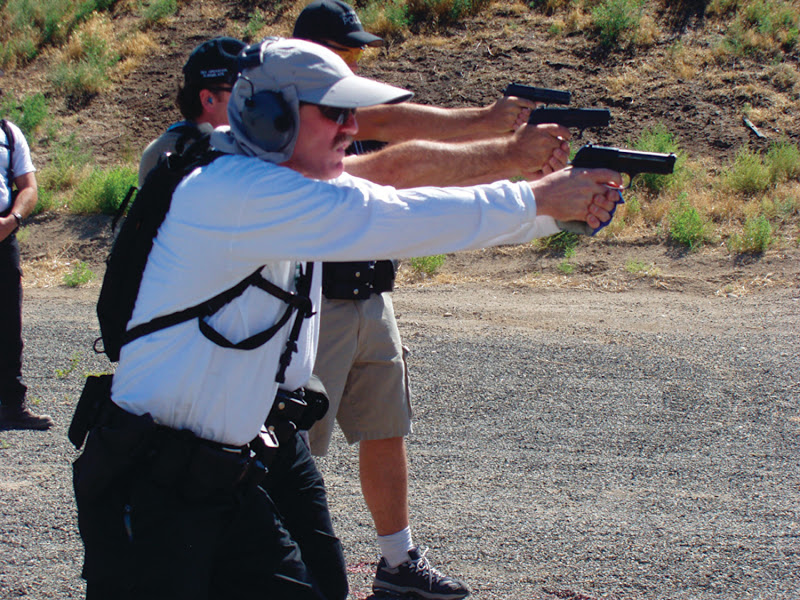
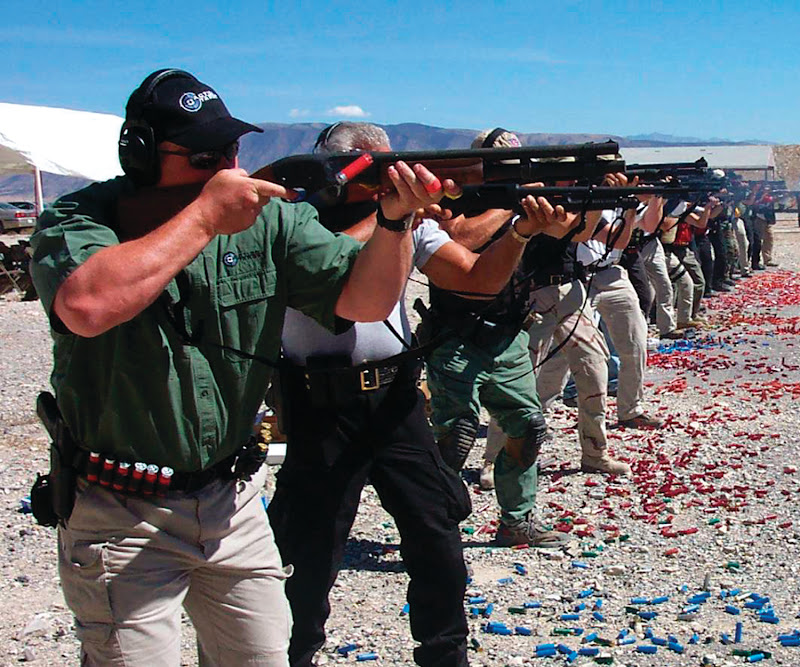
For 20 years, Action Target has hosted one of the most comprehensive training camps for law enforcement in the United States. Law Enforcement Training Camp (LETC) is a week-long curriculum consisting of four eight-hour classes that are taught by world-class firearm instructors.

Law Enforcement TrainingThis year’s LETC provides highly qualified instructors with backgrounds consisting of the Safariland Shooting School, Hoffner’s Training Division, Team Spartan, GLOCK Training, Bill Rogers Shooting School, and the Action Target Academy. Combining high caliber instruction with an effective and comprehensive curriculum makes LETC one of most anticipated events among law enforcement agencies from the U.S. and abroad.

This event creates an opportunity for more hands on practical application of training, idea sharing, the exchange of great stories among advanced trainers and fellow law enforcement officers, and of course, the most trigger time. Each year, those participating in LETC take what they learned and incorporate that knowledge into their existing firearms training programs to help their academy and in-service personnel become more effective.

LETC provides students the opportunity to select a different course to take each day. Some of the courses available this year at LETC are:

  • LETC TrainingHigh Performance Handgun
  • Patrol Rifle/Carbine
  • Ultimate Shotgun
  • Rapid Deployment Patrol Rifle Operator
  • Emergency Medical Response for Firearm Instructors
  • Shoot, Move, & Communicate
  • Glock Armorer
  • Reactive Shooting on Steel for Speed & Accuracy
  • Advanced Practical Handgun
  • Success with Remedial Shooters

LETC

LETC will be held September 12-16, 2011 in Provo, UT. Don’t waste any time! Register by July 31, 2011 and only pay $450 to enjoy a week of shooting and learning from the best law enforcement firearms instructors in the US. Regular admission pricing for LETC begins August 1. Hosting sponsors provide for some scholarships, so please contact your territory managers to see if you qualify.

For more information on LETC, or to take advantage of early registration savings, visit the Training Calendar on our website, or download our information packet and registration form (PDF).

Action Target at the 2011 Bianchi Cup

2011 Bianchi Cup Logo

Action Target is proud to support and sponsor this year’s 2011 MidwayUSA/NRA Bianchi Cup. For the past 25 years, Action Target has sponsored and provided target equipment for firearms competitions across the U.S. and throughout the world. Action Target equipment has been used at the Bianchi Cup for over 20 years and we are proud to be expanding that role and are pleased to continue to support this event.

The Bianchi Cup began as a law enforcement training match in 1979. It was created by former police officer John Bianchi of Bianchi International, the holster manufacturing company. Ray Chapman worked with John and developed this world-class event. Action Target worked with Ray at his facility to provide a target system fit to meet the needs of the cup in the late 80’s. Over the years, this event has brought together shooters from all over the world. Last year’s competitors came from Australia, Canada, Germany, Italy, Japan, New Zealand, Netherlands, Switzerland, and the United States.

The 2011 Bianchi Cup is a competition of speed and accuracy. This year’s awards include the World Famous Silver Bianchi Cup and Division Champion Trophy Cups for the Metallic and Production Division. Class awards are awarded to various categories including High Law Enforcement, High Woman, High Junior, High International, High Newcomer, High Senior, High Grand Senior, High Service, High Semi-Auto, High Revolver, and Aggregate.

The Course of Fire consists of four separate matches:

  • The Practical Event: From the appropriate shooting line, the shooter fires at distances of 10 to 50 yards under varying time limits.
  • The Barricade Event: From within shooting boxes and behind barricades, a shooter fires at targets on either side of the barricade under varying time limits and distances.
  • The Falling Plate Event: From the appropriate shooting line, the shooter fires at 8 inch round steel plates arranged in banks of six at distances of 10 to 25 yards under varying time limits.
  • The Moving Target Event: From within shooting boxes at distances ranging from 10 to 25 yards, the shooter fires at a target moving from left to right, with the target being exposed for only six seconds.

Throughout all matches, competitors shoot from standing and prone positions and are required to shoot with both strong and weak hands at various stages.

The 2011 competition runs from May 25th through May 28th in Columbia, MO. To assist new shooters in their first attempt for the Bianchi Cup, a Newcomer Orientation will be held at the Competitors’ Meeting, also attended by former and current champions and the Match Staff.

To help during these tough economic times, we have instituted a lower entry cost and a “bring a buddy” option. If a competitor brings a friend who has never competed in the Bianchi Cup before, each competitor receives a reduced entry fee. We have also reduced fees for juniors, production firearms, active duty military, and those who register early.

For more information about the 2011 MidwayUSA/NRA Bianchi Cup or to compete, please visit the NRAhq website.

Action Target Introduces New Sport Rack


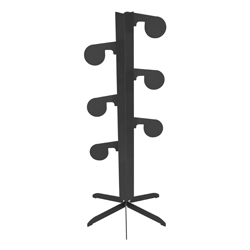
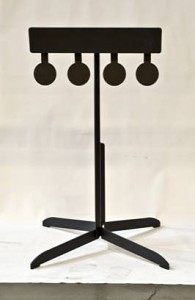
The Sport Rack is a new training option that provides a ‘shooting gallery’ type of design and application. The Sport Rack is another bolt-on head option to the AT Static and PT Practice Stand and can be applied to various organizations and levels of training. Similar in design to the Plate Rack , these plates do not need to be reset once struck.

Here are some things you need to know about the Sport Rack:

Target design:

  • Bolt-on option
  • Mounts onto Static and PT Practice Stand
  • No welds on moving plates – welds on front protective plate
  • Auto-reset & reactive
  • Does not affect the safety of the shooter at appropriate distances

Specifications:

  • Four (4) 4” round plates in 3/8” AR550
  • Total weight of option is 20 lbs. (4 plates, mounting bracket, bolt kit)

How do I order?

Since the Sport Rack is currently a prototype, they are not for sale yet; however, we are putting names on our wait list for when they become available:

Person Information
First Name *
Last Name *
Email *
Options
Please select one:
Yes, I am interested in the Sport Rack and would like to be added to the list so I will be sent more information about the final products price and release date when it becomes available.
Yes, this looks like a product that I would buy when it is released, but I do not want to be sent more information about it.
No, I don’t imagine ever purchasing this product and would prefer not to receive any more information about it.

We are always creating new innovative products and we want your feedback and ideas. If you have a design or concept that would assist your training needs that is not available on the market, let us know. Email Chad Burdette at [email protected] with your product ideas.

Introducing the Pelvic Torso

As a leader of innovative solutions for firearms training, we recently announced the addition of two new items to our product line, the Pelvic Torso and Sport Rack, at the 2011 Shot Show in Las Vegas, NV. In this week’s newsletter, we will highlight the Pelvic Torso and how to utilize it to enhance your training.

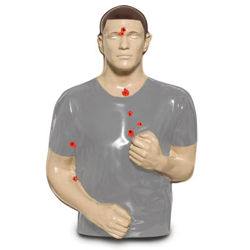
AT Pelvic Torso and Mini PlateUntil recently, there were only paper targets replicating the pelvic area of the body, but with the Pelvic Torso, you now have the first and only steel target option in the world that simulates this area. The steel provides instant feedback to multiple senses as you hear the bullet strike and see the steal plate swing upon impact.

The idea to design the Pelvic Torso came from inquiries from law enforcement and the military for a training element that gave them a tactical solution when engaging with a specific type of threat. As they engaged with threats wearing body armor and no clear head shot, the pelvic girdle became the optimal target area. When an individual is struck in the pelvic girdle, the bullet strikes the ball-and-socket area, which not only causes immense pain but immobilizes the threat completely. If you are participating in disabling drills, the Pelvic Torso is the best training option in the market.

The Pelvic Torso is designed to have two 4” round reactive and auto-resetting head plates added to a non-reduced torso-type head plate. These “bolt-on” options are able to attach to your existing Static Target Stand or PT Practice Stand . We recommend using the torso head plates to protect the reactive components and keep all bolts/brackets out of the shooting zone, although it can be used with the Hostage and Full Size IPSC Torso Head Plates . This allows the splatter to continue to be directed down from the head plate and will not be redirected toward the shooter.

Since the Pelvic Torso is still in prototype mode, it is not yet available for sale. However, if you are interested in purchasing one of these in the future, please let us know:

Person Information
First Name *
Last Name *
Email *
Options
Please select one:
Yes, I am interested in the Pelvic Torso and would like to be added to the list so I will be sent more information about the final products price and release date when it becomes available.
Yes, this looks like a product that I would buy when it is released, but I do not want to be sent more information about it.
No, I don’t imagine ever purchasing this product and would prefer not to receive any more information about it.

For more information, download the Pelvic Torso Cut Sheet here (PDF). Stay tuned to for next week’s newsletter focusing on our new Sport Rack.

Training on Steel (Part Two)

Written by Ben Kurata

In a previous article I discussed the advantages of training on reactive steel, the primary one being a dramatically shortened learning / performance improvement curve.  Other advantages include cost effectiveness.  Say WHAT?  Isn’t steel expensive?  Well, if you are your department’s Range Master or Chief Firearms Trainer, how much do you budget a year for paper or cardboard targets?  Cardboard or foam backers?  Staple guns and staples?  1” x 2” sticks to staple the targets to or 2” X 4” frames and particle board?  How many staple guns grow feet and walk off the range each year?  How much time is spent per relay stapling up new paper or cardboard targets?  What about high wind and rain?  The point is, you can shoot on steel in all kinds of weather, and all you need is a spray can of paint to re-spray the target(s) for the next shooter(s).

I’m going out on a limb here, but I would like to toss out the idea that all in service training for patrol officers can be done on steel and not use a paper or cardboard target at all.  I’m even going to take the idea further and say that qualification can be shot on steel.  If you are like most departments, 70 – 80% hits in an acceptable area of the target and the officer passes qualification until the next time.  All you have to do is measure the surface area (square inches) of the acceptable target surface on your qualification target and find a steel target that is the same shape and has the same surface area.  When firing qualification, each officer firing has a coach (another officer) behind the shooter that has a score sheet of rounds fired at each stage.  All the scoring officer has to do is count the number of hits and record the number of misses at each stage.  At the end of the course, tally up the misses, multiply by your factor (50 rounds, each round worth 2 points, etc.) and you have the qualification score.

Now, I understand that for documentation purposes, some departments are locked into shooting a paper target that can become a part of the officer’s documentation.  I’m just saying that after working with problem shooters for over two decades, I’ve had the quickest and best results by giving the “problem” shooter a steel target that was smaller than their qualification target, bringing them up to accuracy and speed on the smaller steel target, and then having them shoot on their qualification target.  Every “problem” shooter that I worked with in this fashion had no problem going back to their department and easily passing qualification.

I have no explanation for why this works, other than a famous line from a Mel Gibson movie, “Aim small, miss small”.  If your department still uses a qualification target the size of a horse blanket, you’ll always have a certain percentage of shooters who will miss even at the 3 yard line.

To train / shoot on steel safely at CQB distances (less than 10 yards with a handgun), you need two things:

1.     High quality, well designed steel targets;

2.     Pulverizing ammunition.

At the end of this article I’ve attached the Steel Safety Rules that Bank Miller and I wrote a few years ago.  Keep in mind that they were written for conventional ammunition.  The most consistent splatter patterns are with FMJ (ball) ammo.  A 100 yard standoff safe distance when shooting rifle or shotgun slugs seems excessive, but I personally saw a 5.56 mm jacket come off a steel target and cut a shooter at 47 yards from the target, and know another Range Master that had a similar mishap at 60 yards.

First, the steel:

–        At least AR 500 (nobody reputable in the industry uses anything less).

–        Completely smooth and flat target surface, free of any dimples, pock marks, etc..  (Dimples and pock marks will turn an incoming round right back at the shooter.)

–        No protruding bolts, brackets, etc..  These will cause erratic splatter patterns.

–        Target face turned downward at about a 20 degree angle.  This will cause about 80% of the splatter to go downward.

–        Targets should be secured at the end of each training session.  If not, you-know-who will show up with green and black tip 5.56 mm and there goes a $200 or $300 steel target.

You can read the rest in the Steel Safety Rules at the end of this article.  Now I’d like to turn to pulverizing projectiles.  Chances are you’ve never heard of the term “pulverizing projectiles” unless you’ve been around myself or Bank Miller.  Well, for some time, we have taught in our Range Master class that the term “frangible” is misleading for two reasons:

1.     SAMMI, who sets the standards for modern ammunition, has not determined a standard for “frangible”.

2.     Even conventional ammunition is frangible if it hits something hard and dense enough.  If you shoot a 50 BMG into a granite boulder big enough, the projectile will “frange”.  It’s just a question of how big and sharp the “franged” pieces are and how far back they will travel.

Here’s what I mean by “pulverizing projectile”:

1.     No jacket!  If is has a jacket, the jacket will peel off and come back.

2.     When the projectile hits the steel, it completely pulverizes into fine particles like sand, with no pieces larger than a pencil lead, and no broken skin on the shooter or the people standing to the left and right of the shooter.

Since the days when the SIGARMS Academy was the first totally non-toxic frangible range in the country, Mr. Miller and I have tested all “frangible” ammo that comes into our possession by a stringent protocol.  I won’t go into it here, but if you are interested, contact me through Action Target.

Just for clarification, most manufacturers of high quality frangible (pulverizing) ammo manufacture non-toxic variants.  That means that there is no lead or other toxic heavy metals in the primer or cartridge.  If you are shooting on a “clean” (lead-free) range, this is what you want.  But if you are shooting on a conventional range that has had leaded ammo shot on it, you can save some money by purchasing the same ammo with leaded primers.

Here are the Steel Safety Rules:

FIREARMS SAFETY RULES

1.             Treat all firearms as though they are loaded.

2.             Keep your finger outside the trigger guard until you are on target and have decided to fire.

3.            Point the muzzle in a safe direction at all times.

4.             Be sure of your target and what is beyond it.

STEEL TARGET SAFETY RULES

1.             Always obey the Firearms Safety Rules listed above.

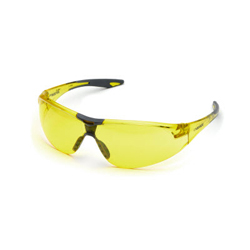
2.             Always wear hearing protection and wrap-around shatter resistant eye protection

3.             Always stand at least 10 yards from the target when using handgun calibers.

4.             Always stand at least 100 yards from the target when using shotgun slugs.

5.             Always stand at least 100 yards from the target when using rifle calibers like .223 and .308.

6.             Never use rifle calibers on handgun rated targets.

7.             Never use ammunition that exceeds 3,000 feet per second at the muzzle.

8.             Never use ammunition that travels below 750 feet per second.

9.             Never shoot BB’s, steel shot, or air gun pellets at steel targets.

10.             Never use more powerful ammunition than the target is rated for.   (Green tip, armor piercing, etc.)

11.             Never shoot on steel that is cratered, pitted, or damaged in any way.

12.             Hard ground surfaces under the target should be covered with plywood or boxed pea gravel.

13.             Targets should be placed with a 3 foot lateral and deep offset from the adjacent target.

14.            If shooting multiple targets, angle of engagement should not exceed 20 degrees.

15.             Use only non-toxic paint on steel targets.

16.             Inspect all targets before using for damage, functionality, etc.

17.             Shooters and observers must wear long pants (no shorts), long sleeve shirts, a cap or hat with a brim, and closed toed shoes.

18.             Instructors and observers should stand behind the shooter and observe all safety rules.

19.            If using frangible ammunition, make sure it is designed to disintegrate into powder on impact.

The same velocity rules apply to frangible ammunition as well.
Range Training – Orlando Police Department

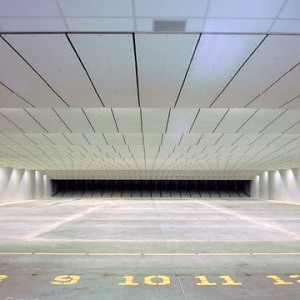
A little over a year ago, the Orlando Police Departments Indoor Shooting range opened for firearms training. The range is a total of 55 lanes and is broken up into 3 separate training bays.

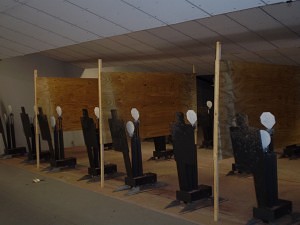
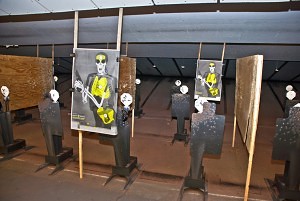
Bay #1 is a 20 lane, 50 yard long shooting distance that includes Tactical ceiling baffling, a High Power Rifle rated Total Containment Bullet Trap with the auger collection method, Dust Collection Unit, and Air Handling system. The primary targets used on this range are reactive Steel targets, incorporating a steel center mass target with either a round head or octagon head being raised for “shoot” or “don’t shoot” scenario’s.

AT Builds New Orlando Firing Range

Bay #2 is also a 20 lane, 50 yard long range that also the same baffles, bullet trap, etc. and the targetry features the inverted runner, swing down targets, and DTAPS decision making targets.

AT helps construct innovative range for Orlando PD

Bay #3 is a 15 lane, 100 yard Rifle Range. This has a “Fixed” firing line and has targets staggered at the 25 yard, 50 yard, 75 yard and 100 yard lines. (again, it has fixed baffles, and the TCT trap, air handling system, etc)

Orlando Police shot at indoor Range

All of these ranges are designed to allow police vehicles to enter the range and replicate traffic stops.

AT Constructs Indoor Shooting Range for Orlando

Eric Clapsaddle, the Orlando Police Department’s Rangemaster, designed several key ideas into the range, such as:

  • The ability to recreate a variety of “low light” conditions again, replicating “real life” gun fight situations.
  • The ability to create flexible barriers, walls, and cover with an insert-able panel for replicating “real life” scenario’s.

The Training that is provided to the Orlando Officers, is some of the closest we have seen to creating as real a situation as possible that the officers have faced or may face. The result of this type of training has been fantastic! Keep in mind the national average for “hits” in a gun fight 7 yards and closer is about 20%. With the training Orlando is doing, that number is closer to 80%, which is truly amazing, and life saving.

As you plan your range, think of ways you can recreate “real gun fights” that have happened in your area, or ones that may be common scenario’s you run into. Think of things like Traffic stops, multiple adversaries, working on scanning and avoiding tunnel vision, decision making targets (good guy / bad guy & shoot / no shoot), hostage drills, and so on. Try to allow the flexibility you need to be able to use these tools in training your officers.

The result will be a better protected community, better protected officers, and because the are better equipped, they will be better prepared.

Action Target thanks our first responders and all those who put themselves in harm’s way to protect the lives and property of others.

Stay Safe!

Training on Steel (Part One)

Written by Ben Kurata

Why train on steel?

The shooter learns faster. Traditional cardboard or paper targets only give the shooter and the coach one feedback, visual. If the bullet holes on the target are not visible (example: 5.56 mm at 100 yards), then the shooter and the coach have to play instant recall to try and determine what the shooter did well and what needs improvement. There is often a delay of several seconds if not minutes before the shooter receives feedback on how (s)he did, and it is difficult if not impossible for the shooter to remember what the sight picture, grip, and trigger press looked and felt like for each and every shot.

Why does the shooter learn faster on steel?

Let’s assume that we are conducting handgun training at traditional handgun fight distances, 15 yards and closer. When training on steel, when the shooter hits, they receive immediate feedback not only visually (the strike of the bullet on the steel) but also auditory feedback (the distinct “ping”).

If the target is a reactive steel target, the shooter also gets the additional feedback of having the target fall or move.

I would also argue that at Close Quarter Combat distances feedback is so immediate that the shooter remembers what the sight picture, grip, and trigger press looked and felt like for each successful shot.

While coaching by the instructor on cardboard or paper tends to be diagnostic, I find that coaching by the instructor on steel tends to be faster and more immediate. (“On the second shot you pulled low and left,” etc. vs. “Low. Low. Hold higher.”) Rather than concentrating on the not so good shots, the shooter and the coach can concentrate on the HITS.

More than one experienced instructor / shooter has put forth the idea that feedback provided by shooting on steel is so immediate that it actually enters the subconscious mind faster than the conscious mind can process all of the stimuli associated with conscious sight picture, grip, trigger press, etc.1 I can speak from my own experience that based thousands of dry fire repetitions with tens of thousands of live fire rapid fire strings, when firing a semi-automatic pistol in rapid fire I am not conscious of sight picture or trigger press as traditionally defined. I am very conscious of the rear outline of the slide (as it is in constant motion), the feel of the pistol in my hands and the trigger reset. With traditional cardboard or paper targets I do not get any feedback until I shoot the pistol to slide lock or the pre-determined number of shots and lower the muzzle. When shooting on steel, I get immediate feedback on each and every shot I fire and if I don’t hear an immediate “ping” after firing a shot, I know that I didn’t hit, and I need to do something differently for the next shot.

In other words, as the student progresses in his/her skill level, (s)he starts correcting him/herself before the coach can diagnose and offer suggestions. At this level, the shooter becomes his/her own coach. I have found that with a little practice, any individual who is motivated enough can easily fire 4-6 rounds a second from a semiautomatic pistol and have all the rounds strike in an acceptable area of the target at 7 yards. When firing this rapidly, you can’t be consciously thinking of “front sight focus, surprise trigger break” for each and every shot or the rate of fire will drop to 1-2 shots per second.

So What?

Well, assuming that both the Officer and the armed assailant in a shooting encounter are equally motivated, would you rather be sending or receiving 4-6 hits per second?

When firing at this rate on steel targets, the auditory response takes third place in perception after the visual (the blur of the rear of the slide crossing into an acceptable target area) and the tactile (the reset and pressing of the trigger). The reason is, if you wait for the “ping” on the steel, you will have delayed your response time by about a half a second or 2 outgoing / incoming rounds. I learned a long time ago while shooting on the Action Target Dueling Tree or Plate Rack that if I waited for the “ping” of my first target, my opponent was usually hitting his second, or even third target. I learned to see an acceptable sight picture for the first shot, press the trigger and immediately shift my eye focus to the second plate while muzzle of the handgun, rifle, or shotgun was still lifting.

Another, more practical reason for trusting your first shot is that in a real-life encounter, you probably won’t hear a “ping” from your adversary. You may not see any immediate reaction at all. There can be many reasons for this. First, and most likely (about 80 – 85% of the time nationally), is the possibility that you missed the threat entirely. That is why we train, train, and train some more. The second reason is that you hit, but did not hit a part of your attacker’s anatomy that would trigger an immediate reaction. (If you have the opportunity to attend one of Dr. James William’s excellent seminars, “Shooting with X-ray Vision”, do so.) The third reason may be that you hit, but the caliber / projectile configuration just didn’t perform as advertised. All of the above are good reasons for training to shoot and hit fast and repeatedly, and the quickest way to do so is to shoot on reactive steel.

In a subsequent article, I will go over how to shoot on reactive steel safely.

Sources:

  1. Bank Miller, Conscious and Subconscious Training on Reactive Steel, The Firearms Instructor, Issue 47.

Reactive Steel Shooting – Auto Popper

Reactive shooting is the skill a police officer must rely on when confronted with a suddenly hazardous situation. It is a critical skill that can save officers’ lives, and it is the result of conditioned hand-eye coordination developed by training on Action Target air-powered reactive steel systems.

As we learn more and more about the human dynamics involved in armed

confrontations, we understand that physical skills that require conscious thought or intellectual processing tend to break down rapidly under high levels of stress. If defensive skills and responses are not programmed in at a subconscious level, the sudden stress may cause us to fumble, freeze or panic. It is in this environment that reactive shooting skills are needed.

Such reflexive shooting skills can be taught through the use of extremely short time limits, thus pushing the shooter to function at the limits of reaction and response time. This can be compared to learning how to hit a fast moving ball with a bat or racket, or developing the reflexes to block a punch or kick at full speed. Reactive steel targets provide the instant feedback required to program an officer’s reflexive shooting skills effectively and efficiently.

In the effort to provide more insight into Action Target’s line of Reactive Steel targets, you are presented with the Auto Popper™.

Auto Popper™

AutoPopper for Steel Targets

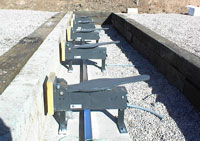
  • Reactive steel with automated reset
  • Multiple control options
  • Knock-down action
  • Through hardened AR500 or AR500 Brinell S
  • Multiple target head options
  • Portable or permanent installation
  • Tall or short legs

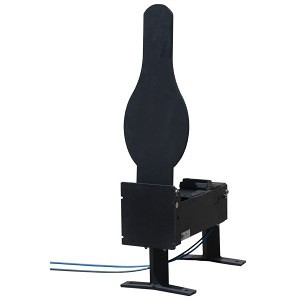
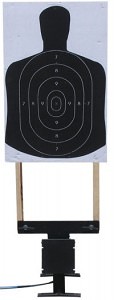
The Auto-Popper™ is an extremely versatile generalpurpose actuator that is used to lift a wide variety of targets. Instead of walking down range after each drill to reset your pepper poppers by hand, you can now reset them automatically with the just the push of a button.

If your scenario requires something other than steel targets, you can quickly change the head attachment to a lifter arm that will accept any size paper or cardboard target. You can even configure the unit for use with military E targets or full size three dimensional targets.

You can add an optional control valve to each Auto-Popper™ for independent control over each target, or you can use a single valve to control a group of targets simultaneously.

The Auto-Popper is an adjustable actuator that lifts a steel or cardboard/plastic target into view of the shooter by remote control. The rise time of the target can vary from 0.50 seconds to 10 seconds. The power is adjustable to allow the actuator to be used with all types of handgun loads. The Auto-Popper has about 60 ft-lbs of torque in the horizontal position tapering proportionally to 0 when vertical. It can be used with steel, paper, cardboard, and large 3 dimensional targets. The Auto-Popper is capable of independent or tandem operation, it can be used with hit sensors, and it can be controlled by our SmartRange control software. The unit is self-armoring, protecting itself against bullet hits from standard handgun loads coming from a direction within +/-25 degrees of perpendicular.

A Row of AutoPopper for Training

The Auto-Popper is pneumatic powered with a pressure operationTarget Type that Can Use AutoPoppern range of 40 psi to 100 psi. It can also be triggered by a 12V signal of less than 60mA. The actuator uses 10.6 cubic inches of air per actuation. It utilizes a “proportional force” cam lifter system to control the reset action and lift action smoothly and reliably. The Auto-Popper is totally field repairable – a complete field rebuild operation can be done by standard range personnel using standard hand tools. The target plate is reversible and easily changeable.
The actuator body and front shielding are both constructed of sandblasted and painted 3/8” armor plate steel (AR500). A lumber façade is attached to the actuator to cover the primary steel structure and prevent splatter. The hose and control wires are in a protective sheath. The hose connections use simple push-in type connectors. The actuator provides an interface to EMT carrier for simple installation. The actuator is easily mounted on any flat surface, or it can be placed on legs to elevate the target.

If you would like some more information about the Auto Popper™ or other Reactive Steel products, please contact the Territory Manager for your region.

Reactive Steel Shooting – Bobber X-treme™

Reactive shooting is the skill a police officer must rely on when confronted with a suddenly hazardous situation. It is a critical skill that can save officers’ lives, and it is the result of conditioned hand-eye coordination developed by training on Action Target air-powered reactive steel systems.

As we learn more and more about the human dynamics involved in armed confrontations, we understand that physical skills that require conscious thought or intellectual processing tend to break down rapidly under high levels of stress. If defensive skills and responses are not programmed in at a subconscious level, the sudden stress may cause us to fumble, freeze or panic. It is in this environment that reactive shooting skills are needed. Such reflexive shooting skills can be taught through the use of extremely short time limits, thus pushing the shooter to function at the limits of reaction and response time. This can be compared to learning how to hit a fast moving ball with a bat or racket, or developing the reflexes to block a punch or kick at full speed. Reactive steel targets provide the instant feedback required to program an officer’s reflexive shooting skills effectively and efficiently.
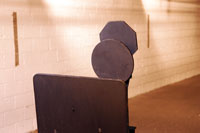
Over the next several months, we will be showcasing our entire Reactive Steel line of targets. First one to be discussed is our Bobber X-treme™:

Bobber X-treme ™

  • Reactive steel with automated reset – Independent target control
  • Multiple AR500 steel target plates – Variable exposure times
  • Choose knock-down or “flop” heads – Computerized scenarios

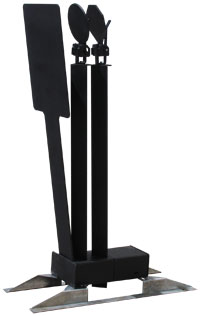
The basic function of the Bobber X-treme™ will probably sound familiar. A steel plate is presented to the shooter from behind cover. This plate can be hit at any time while it is exposed, and a computer interface is used to control the frequency and duration of the target exposures.
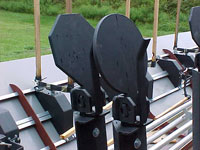
Speed – The exposure times with the Bobber X-treme™ can be as short as a ½ second, so speed is of the essence. The whole idea behind reactive shooting is to train the body to automatically carry out the complex action of firing a gun without having to process the whole sequence with your conscious mind.

Accuracy – Not only is missing the intended target inefficient and ineffective, it is a staggering liability during an actual armed conflict. Because the 8-inch target plates on the Bobber X-treme™ jump up from and retreat behind total cover, only accurately placed shots will have any effect. Painting the chest plate and assuming it to be an innocent bystander or hostage increases the pressure for accuracy even more.

Judgment – Split-second judgment and threat analysis may be the most important elements of the training triangle. The revolutionary Bobber X-treme™ addresses this issue by presenting the shooter with two separate target plates, one directly behind the other. One plate is an 8-inch circle, and the other is an 8-inch octagon. Depending on your training scenario, you can classify all the circle plates as hostile, and all the octagon plates as friendly. When one of the plates jumps up from behind cover, the shooter must quickly determine whether the plate is hostile or friendly and then take the appropriate action. The circles and octagons look enough alike to force the shooter to be sure.

If you would like some more information about the Bobber X-treme™ or other Reactive Steel products, please contact the Territory Manager for your region.