Category: AT Featured Article

Trade-In Old Guns & Ammo and Receive Credit for Future AT Purchases

At Action Target, we know the recent economy affects everyone in different ways. That is why we are finding new and creative ways to help agencies take their used items, like old guns & ammo, and turn them into credit toward purchases in the future. Take for example our recent partnership with Southern Belle Brass. When a department collects their spent brass casings, they contact us and we arrange to have those items picked up and sent to Southern Belle Brass. They then weigh the items and send Action Target a check and the amount is credited to that department’s account allowing them to purchase Portable Steel Targets, Clearing Traps , Portable Runner systems or any other item they may need.

We have now created a new way agencies can reinvest in their firearms programs lessening the money lost to their city, county or department’s general fund.

Action Target Gun and Ammo Trade-in Program

Does this look familiar? Most departments and agencies have guns that are no longer in service simply lying around, which is why we have developed a trade-in option that makes those items work for you. We accept any amount of old duty firearms, confiscated guns, class 3 weapons, and ammunition. Turn your old guns & ammo into cash.

Action Target Trade-in Program

These trucks contain over 16,000 guns collected from the Los Angeles area in a single year. Our new trade-in option allows the Los Angeles department to turn these guns to be turned into new targets and equipment for their training program!

Here is how it works:

Duty Firearms

  • sold for cash or trade in value
  • stripped for parts value & destroyed
  • on-site stripping (250 gun minimum)
  • distributor strip & destroy service available

Confiscated Guns

  • sold for trade value
  • stripped for parts value & destroyed
  • on-site stripping (750 gun minimum)
  • distributor strip & destroy service available

Class 3 Weapons

  • Transferable: Collector sales
  • Non-Transferable: Parts value & destruction

Ammunition

  • Case lots: all calibers accepted
  • Sold for value or traded for another caliber
  • Confiscated: options available

Agency Trades

  • This program is ATF-NFA approved with bids provided by Policetrades.com
  • We accept any quantity of firearms from 1-10,000
  • We offer a parts stripping & destruction program to provide value for agencies unable to trade duty, confiscated and/or surrendered guns
  • Use this credit towards any of your range projects or equipment with Action Target or Law Enforcement Targets.  No expiration.

With today’s budgets, let us help you enhance your training with our new products. Simply look around your department or agency, find the guns, ammunition or firearms that you are not using and send them to us for credit today towards future purchases!

For more information on this program, other types of equipment not listed that may qualify or our full line of shooting range equipment, please contact Chad Burdette at [email protected] or (801) 705-9113, or visit our Programs page. To download a PDF describing this program in more detail click here.

Introducing the Pelvic Torso

As a leader of innovative solutions for firearms training, we recently announced the addition of two new items to our product line, the Pelvic Torso and Sport Rack, at the 2011 Shot Show in Las Vegas, NV. In this week’s newsletter, we will highlight the Pelvic Torso and how to utilize it to enhance your training.

AT Pelvic Torso and Mini Plate
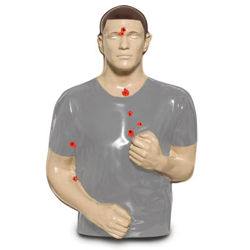
Until recently, there were only paper targets replicating the pelvic area of the body, but with the Pelvic Torso, you now have the first and only steel target option in the world that simulates this area. The steel provides instant feedback to multiple senses as you hear the bullet strike and see the steal plate swing upon impact.

The idea to design the Pelvic Torso came from inquiries from law enforcement and the military for a training element that gave them a tactical solution when engaging with a specific type of threat. As they engaged with threats wearing body armor and no clear head shot, the pelvic girdle became the optimal target area. When an individual is struck in the pelvic girdle, the bullet strikes the ball-and-socket area, which not only causes immense pain but immobilizes the threat completely. If you are participating in disabling drills, the Pelvic Torso is the best training option in the market.

The Pelvic Torso is designed to have two 4” round reactive and auto-resetting head plates added to a non-reduced torso-type head plate. These “bolt-on” options are able to attach to your existing Static Target Stand or PT Practice Stand . We recommend using the torso head plates to protect the reactive components and keep all bolts/brackets out of the shooting zone, although it can be used with the Hostage and Full Size IPSC Torso Head Plates . This allows the splatter to continue to be directed down from the head plate and will not be redirected toward the shooter.

Since the Pelvic Torso is still in prototype mode, it is not yet available for sale. However, if you are interested in purchasing one of these in the future, please let us know:

Person Information
First Name *
Last Name *
Email *
Options
Please select one:
Yes, I am interested in the Pelvic Torso and would like to be added to the list so I will be sent more information about the final products price and release date when it becomes available.
Yes, this looks like a product that I would buy when it is released, but I do not want to be sent more information about it.
No, I don’t imagine ever purchasing this product and would prefer not to receive any more information about it.

For more information, download the Pelvic Torso Cut Sheet here (PDF). Stay tuned to for next week’s newsletter focusing on our new Sport Rack.

Five New Action Target Products Revealed at Shot Show 2011

Action Target was recently represented at Shot Show 2011 at the Sands Expo & Convention Center in Las Vegas, NV from Jan 18-21. The overall scope and size of our booth represented the overall growth success of our company for the last 25 years. The amount of traffic generated this year was astounding. We hardly had a minute to catch our breath and we are grateful for it.

Many of the attendees were drawn in by the impressive design of our booth. It stood 20 feet tall and 60 feet wide, contained two meeting rooms, impressive graphics with accurate reductions of a Modular Armored Tactical Combat House (MATCH) and Total Containment Trap (TCT).

Here is a photo shot of our both taken about an hour before the show opened on the last day:

Action Target Sales and Marketing Teams

We rolled out many new targets, systems and concepts during Shot Show 2011. Some included:

  • Reactive Target System (RTS)These self-healing targets are best fit for close quarter live fire engagements. We wanted to create a viable solution to meet the significant demand we have received from organizations and agencies all around the world. Some of the benefits of the RTS are the ability for the target to fall when struck, count the hits a target takes in a cost effective manner and you will not need to manually count the holes anymore during qualifications. Major benefits of the RTS include the ability of the target to fall when struck and the ability to count the number of hits to a target in a cost effective manner rather than manually counting the holes after qualification rounds. We devoted an entire article to this innovative product line last week.
  • Real Terrain Range (RTR) – Chuck Habermehl helped to develop the concept of the Real Terrain Range to bring a complete realism to training scenarios. At Action Target, we scoured the globe looking any current option narrowing our focus to a company that has been designing Hollywood movie sets for years. Their unique approach and materials allow pullets to pass through a simulate such as a rock, tree or wall causing no ricochet, splatter, inhalation or visibility hazard if any negligent discharge occurs. The RTR design allows Action Target to recreate any training environment you need.
  • FlexTact by Hufcor – FlexTact is the quickest and easiest reconfigurable shoothouse on the market today. As the exclusive worldwide distributor of FlexTact, Action Target was fortunate to have this small example of the system in the booth along with Hufcor’s training staff. The FlexTact increases the quality of your training and throughput and can benefit law enforcement, military and fire departments. The panels are suspended by an overhead railing system which allows you to recreate any building layout in minutes. There are panels are designed with doors, windows and graphics to truly enhance the realism. This is a great compliment to Action Target’s MATCH.
  • Pelvic Torso – The Pelvic Girdle was one of two new steel target prototypes brought to the show. It received a great response, and gave us the opportunity gather feedback that we will put to good use as we continue working on this target as a training solution. This prototype can be added onto an existing Action Target Hostage , IPSC Torso or Full-Size IPSC Torso target. It easily bolts onto the stand, has no welds and replicates the pelvic girdle.  There are two swinging plates that will react when hit. With many agencies training on disabling drills, the Pelvic Torso is the only steel target on the market that addresses this training need. Look out for an article on this product next week.
  • Sport Rack – As a world leader, Action Target has been asked time and again for a portable plate rack. Our existing Plate Rack has the highest quality and design that organizations all around the world over have used with much success. It is however, difficult to carry for long distance shooting which is why we were excited to announce our new Sport Rack. It looks just like a miniature version of our larger model, but it does not have true plate rack properties. The Sport Rack has four inverted round target heads, with no welds, so that when struck they swing upward, similar to the target movement on our horizontal dueling trees . Once again, there was a great deal of interest in this prototype, and look out for a full article about it in two weeks.

If you are interested in the Sport Rack or Pelvic Girdle and would like to add your name on our waiting list to be notified when they are for sale, email [email protected]. If you have questions or are interested in speaking to one of our Range Consultants, please Contact Us.

Reactive Target Systems

At the 2011 Shot Show in Las Vegas, NV, we announced that Action Target is now the worldwide exclusive dealer of Reactive Target Systems (RTS) products. The great advantage RTS has over other systems currently on the market is the ability to build upon a base system. Shown below are all color options of the Static Package that includes a Self-Healing Torso Target , pole and base .

These self-healing Torso Targets can take approximately 2,000 rounds or more, depending on the caliber and distance, before needing replacement. The targets are lightweight and can be left outside all year long making them a great addition for any shooter.

The Static Package becomes reactive when adding the RTS Smart Joint . This innovative joint allows the shooter to engage the target at any distance, falling when struck. For scenarios when a falling target isn’t ideal, a pin can be used to keep the target upright. Shown below is the Smart Joint mounted into the base:

If you want to make your training even more dynamic, add the hit-counting capability to your target.  Using a specific algorithm, the RTS hit sensor reads each hit through a transmitter, sends the hit to a digital display , and informs you how many rounds struck the target. The hit-counting ability reads all calibers, including paintballs, Simunitions and Airsoft. As seen below, the digital numerator uses the same pole and stand as the target, allowing you to have your display stand out of the line of fire, yet remains visible.

As one of the most economical hit sensor/hit counting target systems available, available, this system can increase throughput for training and qualifications by 20-40%, allowing for more “trigger time.”

The RTS system has so many possibilities and applications for all segments of the shooting market, and we want to help you incorporate it into your training programs. RTS makes the difference, so contact a member of our team today!

Why Train on Moving Targets?

Written by Dennis Tueller

Too much of our firearms training is static. That is to say, we seem to spend most of our time and ammunition shooting at single, motionless targets standing directly in front of us. Since this scenario has little to do with what we encounter on the street, why do we continue to train this way? One reason may simply be tradition, or “…because that’s the way we’ve always done it.” That’s not a good enough reason for me either, so what say we just forget that one. Other reasons might include: “We don’t have any moving target equipment” or, “We have enough trouble just getting our trainees to hit the targets that are standing still!” These are valid concerns, and in this article I hope to offer some suggestions and advice that will help you to overcome them both.

First, we should consider the reasons why we need to include moving targets in our firearms training. Let’s review some of the common dynamics we now recognize from the hundreds of real-life police gunfights studied over the years. The vast majority of these confrontations happen within 10 feet or less, and the time span of actual shooting is usually less than 3 seconds. 60% to 70% of these altercations occur in an environment of low, altered, or failing light. Nearly half of the time there are multiple adversaries to contend with. While the statistical studies don’t usually specify the type or degree of the movement involved, we know that people move – especially when they are fighting. Movement to retrieve a weapon, movement to attack, movement to or from a covered position, movement to break physical contact. The fact is, real targets in the real world really move, and our firearms training needs to prepare us for this reality.

Clint Smith, internationally known firearms instructor and the Director of Thunder Ranch, often uses this simple demonstration. He will raise both of his hands up about head high, palms forward. His left hand remains motionless, but he moves his right hand erratically up, down, and back and forth. While doing this, he asks the class, “If one of my hands represents you as a target that is about to be shot at, which target would you rather be?” The answer (for most of us) is obvious. We would choose to be the moving target, because we know that it is much more difficult to hit a moving target.

For years, Clint and many other enlightened firearms instructors have trained their students to move as part of a reflexive response to an armed attack. This is one of the best ways to include movement into your range work. Even if the targets on your range are simply attached to posts in the ground, and the only time they move is when the wind is blowing really hard, your shooters must learn how to move. Taking a lateral step to the right or left while presenting the firearm and issuing a verbal challenge is a simple and worthwhile tactic which should be introduced when your trainees have demonstrated an ability to safely draw, fire, and hit a close-range target in a timely fashion.

Now that you have your shooters moving themselves, you can also teach them to accurately engage moving targets. It’s best to start close, three yards or so, with the target moving at a moderate pace. This is both to instill confidence in the shooter’s ability to hit an animated target, and to create a realistic representation of the kind of target they might have to engage in an actual gunfight. At first, the shooter remains stationary (preferably working from behind some kind of cover prop) while shooting at the mover.

To hit a moving target, one must apply the same basic principles of marksmanship needed to hit a stationary target, i.e.: sight alignment, trigger control, and smooth follow-through. Keep the sights aligned in the center of the target as you track its movement. At the same time the trigger finger is applying steady, even pressure on the trigger until the shot breaks. Here’s the critical part: as the shot breaks, continue to smoothly track the target as you recover from the recoil and reacquire your sight picture and allow the trigger to reset as you prepare to make additional shots. The tendency is for us to stop swinging the gun with the target at the moment of firing, thus resulting a shot going where the target was, instead of where it is going. In my experience, this lack of follow-through is the most common cause for missing shots at a laterally moving target. Yes it is challenging, but the only way to learn to do something well is to practice doing it. As skill and confidence improve, we can increase both the speed of, and the distance to the target, and eventually reintroduce movement by the shooter.

For this sort of training to be possible, of course, you will need some kind of a moving target system. For those of you with an extremely tight budget, a bit of imagination and resourcefulness are in order. Here’s an example: with a little red wagon, a target and stand, some clamps, stakes, pulleys, and a length of rope (don’t forget the duct tape and bailing wire) you can put together a crude but effective moving target system powered by manual labor. If you train on an indoor range, there is probably a target retrieval mechanism in place that can be used to simulate a target that is charging or withdrawing, often with more than a little swinging and bouncing movement included for good measure.

For more advanced solutions, Action Target offers several options for animating your targetry. One of the simplest is the AT Swinger . This is a single, portable target stand with a pivoting mechanism and a weighted counter-balance that allows the target to swing back and forth through a 180 degree arc. The movement of the target is controlled by simply pulling on a cable which is attached through a pulley at the base of the stand. Several of these PT-Swingers can be linked together so the range officer can pull a single cable that will cause the entire bank of targets to swing back and forth in unison. This can allow you to work with a full line of shooters all at the same time.

The Action Target Track Runner is a premiere moving target system designed to be part of a permanent installation. It provides a smooth, wind-proof way to move one or more target carriers laterally at variable speeds. The range officer uses the control box, which is connected to the target system’s electric motor, to start and stop the targets and change their speed and direction. Because of the Track-Runner’s power and advanced design, steel targets can even be incorporated on the target carrier to provide instant visual and audible feedback.

One of our most versatile pieces of equipment is the portable AT Runner . This system uses a motor and control system similar to the Track Runner, but instead of being mounted on a permanent track, the target carrier is suspended by an overhead steel cable. The motor and pulley mechanisms are each supported by single piece of 8-foot long 2×4 lumber. The whole thing can be set up, virtually anywhere, in less than 20 minutes. Because of its portability, the target can be set to run perpendicular to the line of fire, or at differing angles. One of my favorite uses of the Portable-Runner is to set it up as a charger. We can run the target directly at the shooter, who must smoothly back up away from the attacking target while drawing and shooting. Combine this setup with the Action Target 3-D (cardboard torso supported by balloons) silhouette target, and you have a realistic looking threat that will now react to accurately placed shots by by falling to the ground.

No matter what kind of range equipment you may have, I hope you recognize the critical need for instructing our trainees in the important tactical and marksmanship skills they need to accurately and effectively engage moving targets. In our earlier review of police gunfight statistics, I didn’t mention the numbers that reflect our real-world marksmanship performance. These numbers will vary a bit from year to year, but the U.S. national average hit-ratio is about 1 out of 6, or roughly 15%. That is, for every six shots deliberately fired by officers during armed confrontations, only one of those six shots will hit its intended target. That means that 85% of the shots fired during these gunfights are hitting something other than the intended target, often causing expensive property damage, injury, and sometimes death. You don’t need me to tell you about the unpleasant financial, political, and emotional consequences that can result from these errant bullets. Do you think that our officers would achieve better results in their real-world shootouts if they were regularly training on moving targets? I do too. It is up to us as firearms instructors to provide these kinds of training opportunities. We can do better. We must do better. Many lives depend on it. ‘Nuff said. Now, let’s get moving!

Training on Steel (Part Two)

Written by Ben Kurata

In a previous article I discussed the advantages of training on reactive steel, the primary one being a dramatically shortened learning / performance improvement curve.  Other advantages include cost effectiveness.  Say WHAT?  Isn’t steel expensive?  Well, if you are your department’s Range Master or Chief Firearms Trainer, how much do you budget a year for paper or cardboard targets?  Cardboard or foam backers?  Staple guns and staples?  1” x 2” sticks to staple the targets to or 2” X 4” frames and particle board?  How many staple guns grow feet and walk off the range each year?  How much time is spent per relay stapling up new paper or cardboard targets?  What about high wind and rain?  The point is, you can shoot on steel in all kinds of weather, and all you need is a spray can of paint to re-spray the target(s) for the next shooter(s).

I’m going out on a limb here, but I would like to toss out the idea that all in service training for patrol officers can be done on steel and not use a paper or cardboard target at all.  I’m even going to take the idea further and say that qualification can be shot on steel.  If you are like most departments, 70 – 80% hits in an acceptable area of the target and the officer passes qualification until the next time.  All you have to do is measure the surface area (square inches) of the acceptable target surface on your qualification target and find a steel target that is the same shape and has the same surface area.  When firing qualification, each officer firing has a coach (another officer) behind the shooter that has a score sheet of rounds fired at each stage.  All the scoring officer has to do is count the number of hits and record the number of misses at each stage.  At the end of the course, tally up the misses, multiply by your factor (50 rounds, each round worth 2 points, etc.) and you have the qualification score.

Now, I understand that for documentation purposes, some departments are locked into shooting a paper target that can become a part of the officer’s documentation.  I’m just saying that after working with problem shooters for over two decades, I’ve had the quickest and best results by giving the “problem” shooter a steel target that was smaller than their qualification target, bringing them up to accuracy and speed on the smaller steel target, and then having them shoot on their qualification target.  Every “problem” shooter that I worked with in this fashion had no problem going back to their department and easily passing qualification.

I have no explanation for why this works, other than a famous line from a Mel Gibson movie, “Aim small, miss small”.  If your department still uses a qualification target the size of a horse blanket, you’ll always have a certain percentage of shooters who will miss even at the 3 yard line.

To train / shoot on steel safely at CQB distances (less than 10 yards with a handgun), you need two things:

1.     High quality, well designed steel targets;

2.     Pulverizing ammunition.

At the end of this article I’ve attached the Steel Safety Rules that Bank Miller and I wrote a few years ago.  Keep in mind that they were written for conventional ammunition.  The most consistent splatter patterns are with FMJ (ball) ammo.  A 100 yard standoff safe distance when shooting rifle or shotgun slugs seems excessive, but I personally saw a 5.56 mm jacket come off a steel target and cut a shooter at 47 yards from the target, and know another Range Master that had a similar mishap at 60 yards.

First, the steel:

–        At least AR 500 (nobody reputable in the industry uses anything less).

–        Completely smooth and flat target surface, free of any dimples, pock marks, etc..  (Dimples and pock marks will turn an incoming round right back at the shooter.)

–        No protruding bolts, brackets, etc..  These will cause erratic splatter patterns.

–        Target face turned downward at about a 20 degree angle.  This will cause about 80% of the splatter to go downward.

–        Targets should be secured at the end of each training session.  If not, you-know-who will show up with green and black tip 5.56 mm and there goes a $200 or $300 steel target.

You can read the rest in the Steel Safety Rules at the end of this article.  Now I’d like to turn to pulverizing projectiles.  Chances are you’ve never heard of the term “pulverizing projectiles” unless you’ve been around myself or Bank Miller.  Well, for some time, we have taught in our Range Master class that the term “frangible” is misleading for two reasons:

1.     SAMMI, who sets the standards for modern ammunition, has not determined a standard for “frangible”.

2.     Even conventional ammunition is frangible if it hits something hard and dense enough.  If you shoot a 50 BMG into a granite boulder big enough, the projectile will “frange”.  It’s just a question of how big and sharp the “franged” pieces are and how far back they will travel.

Here’s what I mean by “pulverizing projectile”:

1.     No jacket!  If is has a jacket, the jacket will peel off and come back.

2.     When the projectile hits the steel, it completely pulverizes into fine particles like sand, with no pieces larger than a pencil lead, and no broken skin on the shooter or the people standing to the left and right of the shooter.

Since the days when the SIGARMS Academy was the first totally non-toxic frangible range in the country, Mr. Miller and I have tested all “frangible” ammo that comes into our possession by a stringent protocol.  I won’t go into it here, but if you are interested, contact me through Action Target.

Just for clarification, most manufacturers of high quality frangible (pulverizing) ammo manufacture non-toxic variants.  That means that there is no lead or other toxic heavy metals in the primer or cartridge.  If you are shooting on a “clean” (lead-free) range, this is what you want.  But if you are shooting on a conventional range that has had leaded ammo shot on it, you can save some money by purchasing the same ammo with leaded primers.

Here are the Steel Safety Rules:

FIREARMS SAFETY RULES

1.             Treat all firearms as though they are loaded.

2.             Keep your finger outside the trigger guard until you are on target and have decided to fire.

3.            Point the muzzle in a safe direction at all times.

4.             Be sure of your target and what is beyond it.

STEEL TARGET SAFETY RULES

1.             Always obey the Firearms Safety Rules listed above.

2.             Always wear hearing protection and wrap-around shatter resistant eye protection

3.             Always stand at least 10 yards from the target when using handgun calibers.

4.             Always stand at least 100 yards from the target when using shotgun slugs.

5.             Always stand at least 100 yards from the target when using rifle calibers like .223 and .308.

6.             Never use rifle calibers on handgun rated targets.

7.             Never use ammunition that exceeds 3,000 feet per second at the muzzle.

8.             Never use ammunition that travels below 750 feet per second.

9.             Never shoot BB’s, steel shot, or air gun pellets at steel targets.

10.             Never use more powerful ammunition than the target is rated for.   (Green tip, armor piercing, etc.)

11.             Never shoot on steel that is cratered, pitted, or damaged in any way.

12.             Hard ground surfaces under the target should be covered with plywood or boxed pea gravel.

13.             Targets should be placed with a 3 foot lateral and deep offset from the adjacent target.

14.            If shooting multiple targets, angle of engagement should not exceed 20 degrees.

15.             Use only non-toxic paint on steel targets.

16.             Inspect all targets before using for damage, functionality, etc.

17.             Shooters and observers must wear long pants (no shorts), long sleeve shirts, a cap or hat with a brim, and closed toed shoes.

18.             Instructors and observers should stand behind the shooter and observe all safety rules.

19.            If using frangible ammunition, make sure it is designed to disintegrate into powder on impact.

The same velocity rules apply to frangible ammunition as well.

Training on Steel (Part One)

Written by Ben Kurata

Why train on steel?

The shooter learns faster. Traditional cardboard or paper targets only give the shooter and the coach one feedback, visual. If the bullet holes on the target are not visible (example: 5.56 mm at 100 yards), then the shooter and the coach have to play instant recall to try and determine what the shooter did well and what needs improvement. There is often a delay of several seconds if not minutes before the shooter receives feedback on how (s)he did, and it is difficult if not impossible for the shooter to remember what the sight picture, grip, and trigger press looked and felt like for each and every shot.

Why does the shooter learn faster on steel?

Let’s assume that we are conducting handgun training at traditional handgun fight distances, 15 yards and closer. When training on steel, when the shooter hits, they receive immediate feedback not only visually (the strike of the bullet on the steel) but also auditory feedback (the distinct “ping”).

If the target is a reactive steel target, the shooter also gets the additional feedback of having the target fall or move.

I would also argue that at Close Quarter Combat distances feedback is so immediate that the shooter remembers what the sight picture, grip, and trigger press looked and felt like for each successful shot.

While coaching by the instructor on cardboard or paper tends to be diagnostic, I find that coaching by the instructor on steel tends to be faster and more immediate. (“On the second shot you pulled low and left,” etc. vs. “Low. Low. Hold higher.”) Rather than concentrating on the not so good shots, the shooter and the coach can concentrate on the HITS.

More than one experienced instructor / shooter has put forth the idea that feedback provided by shooting on steel is so immediate that it actually enters the subconscious mind faster than the conscious mind can process all of the stimuli associated with conscious sight picture, grip, trigger press, etc.1 I can speak from my own experience that based thousands of dry fire repetitions with tens of thousands of live fire rapid fire strings, when firing a semi-automatic pistol in rapid fire I am not conscious of sight picture or trigger press as traditionally defined. I am very conscious of the rear outline of the slide (as it is in constant motion), the feel of the pistol in my hands and the trigger reset. With traditional cardboard or paper targets I do not get any feedback until I shoot the pistol to slide lock or the pre-determined number of shots and lower the muzzle. When shooting on steel, I get immediate feedback on each and every shot I fire and if I don’t hear an immediate “ping” after firing a shot, I know that I didn’t hit, and I need to do something differently for the next shot.

In other words, as the student progresses in his/her skill level, (s)he starts correcting him/herself before the coach can diagnose and offer suggestions. At this level, the shooter becomes his/her own coach. I have found that with a little practice, any individual who is motivated enough can easily fire 4-6 rounds a second from a semiautomatic pistol and have all the rounds strike in an acceptable area of the target at 7 yards. When firing this rapidly, you can’t be consciously thinking of “front sight focus, surprise trigger break” for each and every shot or the rate of fire will drop to 1-2 shots per second.

So What?

Well, assuming that both the Officer and the armed assailant in a shooting encounter are equally motivated, would you rather be sending or receiving 4-6 hits per second?

When firing at this rate on steel targets, the auditory response takes third place in perception after the visual (the blur of the rear of the slide crossing into an acceptable target area) and the tactile (the reset and pressing of the trigger). The reason is, if you wait for the “ping” on the steel, you will have delayed your response time by about a half a second or 2 outgoing / incoming rounds. I learned a long time ago while shooting on the Action Target Dueling Tree or Plate Rack that if I waited for the “ping” of my first target, my opponent was usually hitting his second, or even third target. I learned to see an acceptable sight picture for the first shot, press the trigger and immediately shift my eye focus to the second plate while muzzle of the handgun, rifle, or shotgun was still lifting.

Another, more practical reason for trusting your first shot is that in a real-life encounter, you probably won’t hear a “ping” from your adversary. You may not see any immediate reaction at all. There can be many reasons for this. First, and most likely (about 80 – 85% of the time nationally), is the possibility that you missed the threat entirely. That is why we train, train, and train some more. The second reason is that you hit, but did not hit a part of your attacker’s anatomy that would trigger an immediate reaction. (If you have the opportunity to attend one of Dr. James William’s excellent seminars, “Shooting with X-ray Vision”, do so.) The third reason may be that you hit, but the caliber / projectile configuration just didn’t perform as advertised. All of the above are good reasons for training to shoot and hit fast and repeatedly, and the quickest way to do so is to shoot on reactive steel.

In a subsequent article, I will go over how to shoot on reactive steel safely.

Sources:

  1. Bank Miller, Conscious and Subconscious Training on Reactive Steel, The Firearms Instructor, Issue 47.

Crucial Equipment Placement

Written by Ben Kurata

Thoughts on equipment placement, conditioned response, reaction time, Hick’s Law, the 21 foot guideline, and the OODA loop

Disclaimer 1: I do not consider myself to be an expert on any of the above topics. I am, however, really good at asking questions. I am a serious student of human behavior under stress.

Disclaimer 2: In no way what I write should be misinterpreted as passing judgment on the Officer(s) involved. In the past, I have been judged by people who were not beside me when bad things happened. I refuse to be a “Monday morning quarterback” to situations I was not involved in.

Disclaimer 3: The above title gives the reader an insight into how my mind works. I struggle on a good day to have an independent thought. I have had the privilege, however, to have trained with some absolutely brilliant thinkers / operators / teachers. I will attempt to give them the credit they deserve.

Recently, a transit Officer was convicted of homicide after he shot an individual to death while attempting to control the subject’s behavior. According to the Officer’s testimony, he thought he was reaching for his Taser but discharged his duty firearm instead, killing the subject.

Now, I am not here to pass judgment on the Officer’s actions, as I was not there. But for some time, I have recommended that Tasers be mounted on the duty belt on the non-dominant side, with the grip pointed backward, NOT in a cross-draw position. Why? Well, over the course of his / her career, a LEO may pull their handgun from its holster hundreds, maybe thousands of times during in-service training and qualification. A LE Trainer may pull a handgun from its holster tens of thousands of times.

Question:

How many times does an average LEO pull a Taser from its holster and discharge it? In most departments that I have trained with, after initial training (with its “special” videotaped moments), the only time a Taser gets pulled from its holster is when it is used on a subject. I know of no in-service or qualification live fire course of fire for the Taser.

What’s the point?

Well, many years ago, someone much wiser than I will ever be said:
“Under stress, you will revert to what you do most often or most recently.”
I only wish I could remember who told me that so I could give them credit. The point is, the dominant hand has been conditioned by hundreds (if not thousands) of repetitions to access and fire the handgun, not the Taser.

Similarly, I wish I could have a dollar for every time I saw on the range a cell phone or pager get pulled from the belt and forcibly stuffed into the magazine well of a weapon. Why? Because the operator was reverting back to the location and object on his / her duty belt that (s)he accesses most often in the course of a day – dozens of times.

Many years ago, fellow Action Target Instructor Dennis Tueller established the 21 foot guideline which has been misinterpreted over the years as the “21 foot rule”. While not diminishing the validity of what Dennis established, I can say that for the average LE Instructor (who, in theory, should be smoother and quicker at presenting the duty handgun from the duty holster) the average reactionary gap when wearing a Level II or Level III retention holster is more like 40 – 60 feet. That is with the outcome pre-determined – draw the handgun and place one or two well-placed shots on an inert practice target. Under the stress of a life -threatening attack, reaction time can double, quadruple, or deteriorate even more. Why? Well, some definitions may be useful:

Reaction Time:

“Reaction time has sometimes been described as a function of Hick’s law:
(1) H = log2(n + 1).
(2) H = Σ pi log2(1/pi + 1).
H = the information-theoretic entropy of a decision.
n = the number of equally probable alternatives.
pi = the probability of alternative i for n alternatives of unequal probability.
The time it takes to make a decision is roughly proportional to H, the entropy of the decision (the log of the number of alternatives), i.e. T = k H, where k ~ 150 msec” 1

Now, I have no idea what that means, but it may be useful in calculating the probability of getting a raise or the budget you submitted. “Entropy of the decision” is the scientific way of saying “brain cramp”! What is important to note is that formula was established by test subjects that were not being presented with life-threatening stimuli, and under ideal conditions, reaction time is a logarithmic, (12, 22, 32, etc.) not an arithmetic (1 + 1, 2 + 1, etc.) variable.

Now, how many use of force options does the average Officer have?

  1. Presence;
  2. Verbal instructions / commands;
  3. Empty hand techniques;
  4. Aerosol spray;
  5. Baton;
  6. Taser;
  7. Radio;
  8. Lethal force, which can include:
    1. Handgun;
    2. Folding knife;
    3. Baton, if targeted on “red” areas of the anatomy;
    4. Shotgun;
    5. Patrol Rifle;
    6. Improvised weapons (“Bumper – 06”);
    7. Etc.

And, let us not forget that word that has been pounded into every Officer’s head (and we have to share the responsibility for this one): Liability.

Now, let’s add the one factor that throws almost all probability theory out the window: Life – threatening stimuli.

A concept which may be more useful in understanding actual reaction time under life – threatening circumstances may be USAF Lt. Col. (Ret.) John Boyd’s OODA loop. It is not my intention here to recap my understanding of the OODA loop. (For an excellent summary, please locate and read Ken Good’s article, “Got a Second? Boyd’s OODA Cycle in the Close Quarter Battle Environment”.) Suffice it to say that after being in and running a few force-on-force simulations, most people (including myself) make mistakes in the initial Observation phase and then get caught in what Ken Murray describes as a “goofy loop” 2 – unable to make an appropriate decision as to what to do next. Or, caught on the reaction (wrong) side of the action / reaction curve.

So What?

Well, let me just throw this out for thought:

  • All less lethal tools (including radio, pager, and cell phone) on the non – dominant side of the duty belt / LBE, etc., accessed and practiced with the non-dominant hand.
  • All lethal force tools on the dominant side of the duty belt, accessed and practiced with the dominant hand.

Now, please don’t misinterpret me. I am not saying to stop practicing wounded / disabled drills. Now, more than ever, I practice accessing, shooting, reloading, and clearing stoppages with the non – dominant hand AND EYE only. It all boils down to, “Under stress, you will revert to what you do most often or most recently.”

(If you are the trainer who said that to me many years ago, please contact me so that I can give you proper credit.)

Notes:

1.   https://www.usabilityfirst.com/glossary/hicks-law/
2.   Kenneth R. Murray, “Training at the Speed of Life, Volume 1”, copyright Armiger Publications, 2004.

Function Testing Long Guns (Part Two)

Written by Benjamin Kurata

*This is the second entry in a 2-part series on Long Gun Function Testing. The first entry was published two weeks earlier.

In a previous article, I covered function testing the AR-15 / M4 patrol rifle and variants. Now, let’s turn to that old standby of the police arsenal, the 12 gauge pump shotgun. It’s a common misconception that the 12 gauge pump shotgun is maintenance free. Certainly, the majority of shotguns I’ve seen were evidence of this misguided belief. The police shotgun has to be routinely cleaned, lubricated and function tested the same as any other duty weapon. One area that most shooters overlook when cleaning and lubricating the police shotgun is the magazine tube. The tube is made of steel, and the magazine spring and shell follower are made of steel. (If the shell follower in your shotgun is a thin plastic cap, discard it and get the steel one. If the plastic cap breaks inside the magazine tube, you’ll have to put the shotgun on to the workbench to get it to work again.) When the shotgun is carried in “cruiser carry” mode, the magazine spring is compressed against the interior of the magazine tube. Let some moisture get into the magazine tube, and corrosion of magazine spring can occur.

Whenever I disassemble, clean, lubricate and function test my shotgun, I push a bore brush and patches wet with solvent through the magazine tube until the patches come out clean. I finish up with a clean patch moistened with lubricant followed by a clean, dry patch. A wipe down of the magazine spring with some lubricant completes the maintenance on the magazine tube.

Function Testing of the Pump Shotgun:

  1. Make certain that there is no live ammunition in the magazine tube or chamber. With the bolt back, a quick physical check through the loading port by touching the magazine follower and the empty chamber gets the task done.
  2. Pump the fore end all the way forward. Try to pull the fore end back. The fore end and bolt should remain locked forward.
  3. Put the safety on “Safe”. Press the trigger, hard. Nothing should happen.
  4. Point the muzzle in a safe direction and press the trigger. You should feel / hear a normal hammer fall. Keep the trigger depressed.
  5. With the trigger depressed, roll the shotgun sideways so you can look through the ejection port. Slowly work the fore end all the way back and then forward. You should see the shell lifter rise up when you start the fore end forward. Continue to push the fore end all the way forward while keeping the trigger depressed.
  6. Slowly let the trigger forward until you feel and hear the disconnector reset. It won’t take much forward motion of the trigger, and the reset will be subtle. The reset on my personal Remington 870 feels about the same as my 1911A1 Colt. Yes, all modern pump shotguns since the model 1897 Winchester have disconnectors.
  7. Press the trigger again. You function test is now complete.

Function Testing the Police Semiautomatic Shotgun:

  1. Make certain that there is no live ammunition in the magazine tube or chamber. With the bolt back, a quick physical check through the loading port or the ejection port by touching the magazine follower and the empty chamber gets the task done.
  2. Let the bolt go forward by pressing the bolt release button. The bolt should move forward sharply and lock into the rear of the barrel.
  3. Point the muzzle in a safe direction and put the safety on “Safe”. Press the trigger, hard. Nothing should happen.
  4. Point the muzzle in a safe direction and press the trigger. You should feel / hear a normal hammer fall. Keep the trigger depressed.
  5. With the trigger depressed, roll the shotgun sideways so you can look through the ejection port. Slowly pull the charging handle to the rear with your non-dominant hand and ease it slowly forward. As the bolt starts forward, you should see the shell lifter rise up. Work the charging handle back and forth a few times. You shouldn’t feel any unusual binding, just slight resistance when the bolt unlocks and a slight “bump” as the bolt body passes over the hammer.
  6. Pull the charging handle all the way back and let it fly forward.
  7. Slowly let the trigger forward until you hear and feel the disconnector reset. Again, this won’t take much forward motion of the trigger and is subtle (compared to the disconnector reset on say, an AR-15).
  8. Press the trigger again. Your function test is now complete.

Function Testing Long Guns (Part One)

Written by Benjamin Kurata

*This is the first entry in a 2-part series. The second installment will publish in coming issues.

12 gauge pump shotguns have been part of the Law Enforcement arsenal for a long time, and patrol rifles are becoming more commonplace, with the AR-15, M4 or some variant being the most common. It is no secret that I am a proponent of the patrol rifle, as anything a handgun can do, a rifle can do better, and from a longer distance. As more and more of America’s LE Officers are being confronted with rifles (the semiauto AK-47, SKS and variants being the most common), it’s time to rethink operational priorities. Early in my LE career, when the 12 gauge pump was the standard LE long gun, you could always tell the rookies (myself included) from the veterans. The rookies would go dashing off to the scene of a shots fired or man with a gun call, where the veterans would always take the few seconds to get to the trunk, take out the 12 gauge pump, and maybe grab a pocketful of extra buckshot or slugs. Therein lies a lesson:

Don’t take a handgun to a long gun fight.

Now, I can hear the cyber moaning and wailing already as I type this. “My department will never allow… My Chief will never go for…. The community will be in an uproar….”, etc., etc. All I can say is, I never thought I’d see the day when fully geared up NYPD ESU Officers would be visibly present at major infrastructure locations in Manhattan, wearing M4’s, full raid vests including a Kevlar lid, but that day is here. If you don’t ask, you don’t get. I’m not making light of any department’s struggles with getting a patrol rifle program accepted and funded, as I have assisted many departments with getting their programs off the ground and know how difficult it is. My point is, more and more of America’s finest are being gunned down with a rifle chambered in 7.62 X 39 COMBLOC. When facing a rifle with a 30 round box magazine attached, even your favorite high capacity 9mm / .357 SIG / .40 S&W / .45 ACP is not “enough gun”. You need a long gun.

Maximizing Patrol Rifle Reliability:

The AR-15 / M4 (or some variant) is the most common patrol rifle, so let’s focus on it first. First, the direct gas impingement system invented by Eugene Stoner is an inherently high maintenance system. Anyone who has spent the better part of an evening attempting to scrape the last bit of carbon fouling off the bolt tail or the corresponding recesses in the bolt carrier knows what I am talking about. Which brings up an operational question: How often / who will perform routine preventative maintenance on the issued rifles? The Stoner system also requires a fair amount of lubrication, particularly once you start firing it, as the gas blowing back onto the bolt has a tendency to burn off any lubrication on the bolt’s gas rings quickly. Here in the Southwest, where the air temperatures have been above 100 degrees F all week, the temperature inside a police cruiser’s trunk is hot enough to bake a pizza. Almost every patrol rifle that I have seen taken directly out of a cruiser’s trunk has been bone dry and badly in need of lubrication. Routine maintenance is critical if the rifle is going to function reliably.

Another area to look at closely is the patrol rifle’s magazines. I covered magazine function checks in a previous article, but suffice it to say that just previous to the last national high capacity magazine ban, anybody with aluminum sheet metal and a spot welder was cranking out AR-15 magazines. Even the original mil-spec magazines were intended to be used just a few times, then discarded. I personally run only stainless steel mags with a military phosphate or nitride finish. If a rifle magazine is not feeding properly due to a split back seam (common) or bent feed lips, take it out of inventory and destroy it.

Patrol Rifle Function Test:

Make certain that there is no live ammunition in the rifle or associated magazines. Again, I find a physical chamber check going up through the mag well faster and more accurate than a visual check.

  1. Let the bolt go forward.
  2. Insert a mag and lock it into the mag well.
  3. Pull back smartly on the charging handle. The bolt should lock to the rear. If it does not, check the orientation of the magazine springs. Unlike most pistol magazines, the spring in most AR-15 mil-spec mags is attached to the follower and is difficult to orient backward. But, if it is humanly possible…
  4. Push the charging handle forward into the locked position.
  5. Push the magazine release button. The magazine should fall free under its own weight. If it does not, it could be due to either a bent magazine tube OR the magazine release catch has been screwed too far into the mag well. If you have the same problem with all of your mags, try backing off the catch arm one full turn and repeat the test.
  6. Slap the bolt release. The bolt should fly forward sharply and lock up into the rear of the barrel.
  7. Point the muzzle in a safe direction and put the safety on “Safe”. Pull the trigger, hard. Nothing should happen.
  8. Put the safety on “Fire”. Press the trigger. You should have a normal trigger press and hammer fall. Keep the trigger depressed.
  9. Rack the charging handle.
  10. Let the trigger go forward slowly until you hear and feel the very loud disconnector reset.
  11. Press the trigger again.
  12. Attempt to put the safety on “Safe”. With the hammer down on an AR-15 and variants, the safety cannot be put on safe.
  13. Repeat for all remaining magazines.

*This is the first entry in a 2-part series. The second installment will publish in coming issues.