Author: Marketing Action Target

Range Training – Orlando Police Department

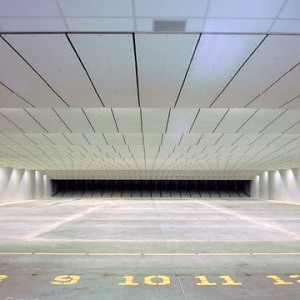
A little over a year ago, the Orlando Police Departments Indoor Shooting range opened for firearms training. The range is a total of 55 lanes and is broken up into 3 separate training bays.

Bay #1 is a 20 lane, 50 yard long shooting distance that includes Tactical ceiling baffling, a High Power Rifle rated Total Containment Bullet Trap with the auger collection method, Dust Collection Unit, and Air Handling system. The primary targets used on this range are reactive Steel targets, incorporating a steel center mass target with either a round head or octagon head being raised for “shoot” or “don’t shoot” scenario’s.

AT Builds New Orlando Firing Range

Bay #2 is also a 20 lane, 50 yard long range that also the same baffles, bullet trap, etc. and the targetry features the inverted runner, swing down targets, and DTAPS decision making targets.

AT helps construct innovative range for Orlando PD

Bay #3 is a 15 lane, 100 yard Rifle Range. This has a “Fixed” firing line and has targets staggered at the 25 yard, 50 yard, 75 yard and 100 yard lines. (again, it has fixed baffles, and the TCT trap, air handling system, etc)

Orlando Police shot at indoor Range

All of these ranges are designed to allow police vehicles to enter the range and replicate traffic stops.

AT Constructs Indoor Shooting Range for Orlando

Eric Clapsaddle, the Orlando Police Department’s Rangemaster, designed several key ideas into the range, such as:

  • The ability to recreate a variety of “low light” conditions again, replicating “real life” gun fight situations.
  • The ability to create flexible barriers, walls, and cover with an insert-able panel for replicating “real life” scenario’s.

The Training that is provided to the Orlando Officers, is some of the closest we have seen to creating as real a situation as possible that the officers have faced or may face. The result of this type of training has been fantastic! Keep in mind the national average for “hits” in a gun fight 7 yards and closer is about 20%. With the training Orlando is doing, that number is closer to 80%, which is truly amazing, and life saving.

As you plan your range, think of ways you can recreate “real gun fights” that have happened in your area, or ones that may be common scenario’s you run into. Think of things like Traffic stops, multiple adversaries, working on scanning and avoiding tunnel vision, decision making targets (good guy / bad guy & shoot / no shoot), hostage drills, and so on. Try to allow the flexibility you need to be able to use these tools in training your officers.

The result will be a better protected community, better protected officers, and because the are better equipped, they will be better prepared.

Action Target thanks our first responders and all those who put themselves in harm’s way to protect the lives and property of others.

Stay Safe!

2 AR550 AT Static Stands

A staple in nearly all of our customer’s array of steel targets is our AT Static . For a limited time, you can get two of our AT Static stands with AR550 (rifle rated) shooting surfaces for 25% off MSRP. With this offer, you can mix and match these components to make two target systems you need and get it at a significantly reduced price. This offer is only valid when purchasing “Heavy Duty” static targets.

Stand Height

  • 1′
  • 2′
  • 3′
  • 4′

Head Plate

  • 6” round
  • 8” round
  • 10” round
  • 12” round
  • 8” x 12” rectangle
  • 40% IPSC Torso

Use the code STATIC550 when placing your order in the online store for the discount.

This offer is available at the Action Target Store or by contacting the Territory Manager for your area.

OFFER EXPIRES JANUARY 20, 2011

UPDATE: Due to some complications with the online store, the STATIC550 coupon is only recognized as valid when purchasing two identical Heavy Duty Static Targets. If you would like two different types of heavy duty AT Statics (for example, one a 12″ round head plate with a 1′ stand height and the second a 6″ round head plate with a 4′ stand height), select one of the configurations you would like and set the quantity to two. This will allow you to put in the STATIC550 code and have it be recognized by the store. As you check out there is a comments box – in this comments section make a note that you are using the STATIC550 code and then give the actual specs for the two stands you would like. This will allow your coupon and order to go through, and we will send you the stands that you outline in the comments section. Alternatively, you can call us at 801-377-8033 ext. 113 to place your order. We apologize for any inconvenience this causes.

New Action Target Website

Action Target is pleased to announce the launch of the new Action Target website. The new website will continue to be a key source of information for firearms training, addressing the specific needs of our major customer segments: Military, Law Enforcement, Commercial/Sport Shooting, and Planners/Architects. In addition to the great information and product descriptions that were already present on our old website, we have also added some great new features and will continue to add more throughout the year:

Online Store: Our online store is now more fully integrated with the main ActionTarget.com website. In addition to selling all of our Portable Targets online, you can also purchase other important shooting accessories such as cardboard targets, clearing traps, and Action Target apparel. The shopping experience is now easier than ever with a streamlined shopping cart, product recommendations, and expanded product descriptions. → Visit the store

The @ Report: Our weekly newsletter, officially known as The @ Report, now works together with its online counterpart to create a socially interactive atmosphere. After reading an article, you will have the ability to post a comment, share the article through social media buttons, and find other related articles by through article tags. The @ Report is a vibrant and interactive resource to stay up-to-date on industry news, recent builds, and informational articles that will help you and your organization create the perfect firearms training. → Visit The @ Report

Media: Our Media page now consolidates important industry news and Action Target press releases so you can stay current on changes that are important to your organization. We also pull the most recent articles from PoliceOne.com and Officer.com for your convenience. → Visit the Media Page

Action Target Academy: Starting in 2011, we will offer online registration and payment for our Action Target Academy events. Offering online registration will allow you to quickly register whenever is convenient for you, also allowing registration for your whole department or organization at once. → Visit the Action Target Academy Page

Online Project and Proposal Builder: One of our most exciting features to be added in 2011 will be our online Project and Proposal Builder. This new feature will allow you to build and design your dream range online by selecting the parts and features you want. After defining the scope of your project, the builder will give you an approximate bid and put you in contact with your area representative for further information and counseling before building your site.

We’re excited to have these great new features and look forward to hearing your feedback and working with you in the future!

Training on Steel (Part One)

Written by Ben Kurata

Why train on steel?

The shooter learns faster. Traditional cardboard or paper targets only give the shooter and the coach one feedback, visual. If the bullet holes on the target are not visible (example: 5.56 mm at 100 yards), then the shooter and the coach have to play instant recall to try and determine what the shooter did well and what needs improvement. There is often a delay of several seconds if not minutes before the shooter receives feedback on how (s)he did, and it is difficult if not impossible for the shooter to remember what the sight picture, grip, and trigger press looked and felt like for each and every shot.

Why does the shooter learn faster on steel?

Let’s assume that we are conducting handgun training at traditional handgun fight distances, 15 yards and closer. When training on steel, when the shooter hits, they receive immediate feedback not only visually (the strike of the bullet on the steel) but also auditory feedback (the distinct “ping”).

If the target is a reactive steel target, the shooter also gets the additional feedback of having the target fall or move.

I would also argue that at Close Quarter Combat distances feedback is so immediate that the shooter remembers what the sight picture, grip, and trigger press looked and felt like for each successful shot.

While coaching by the instructor on cardboard or paper tends to be diagnostic, I find that coaching by the instructor on steel tends to be faster and more immediate. (“On the second shot you pulled low and left,” etc. vs. “Low. Low. Hold higher.”) Rather than concentrating on the not so good shots, the shooter and the coach can concentrate on the HITS.

More than one experienced instructor / shooter has put forth the idea that feedback provided by shooting on steel is so immediate that it actually enters the subconscious mind faster than the conscious mind can process all of the stimuli associated with conscious sight picture, grip, trigger press, etc.1 I can speak from my own experience that based thousands of dry fire repetitions with tens of thousands of live fire rapid fire strings, when firing a semi-automatic pistol in rapid fire I am not conscious of sight picture or trigger press as traditionally defined. I am very conscious of the rear outline of the slide (as it is in constant motion), the feel of the pistol in my hands and the trigger reset. With traditional cardboard or paper targets I do not get any feedback until I shoot the pistol to slide lock or the pre-determined number of shots and lower the muzzle. When shooting on steel, I get immediate feedback on each and every shot I fire and if I don’t hear an immediate “ping” after firing a shot, I know that I didn’t hit, and I need to do something differently for the next shot.

In other words, as the student progresses in his/her skill level, (s)he starts correcting him/herself before the coach can diagnose and offer suggestions. At this level, the shooter becomes his/her own coach. I have found that with a little practice, any individual who is motivated enough can easily fire 4-6 rounds a second from a semiautomatic pistol and have all the rounds strike in an acceptable area of the target at 7 yards. When firing this rapidly, you can’t be consciously thinking of “front sight focus, surprise trigger break” for each and every shot or the rate of fire will drop to 1-2 shots per second.

So What?

Well, assuming that both the Officer and the armed assailant in a shooting encounter are equally motivated, would you rather be sending or receiving 4-6 hits per second?

When firing at this rate on steel targets, the auditory response takes third place in perception after the visual (the blur of the rear of the slide crossing into an acceptable target area) and the tactile (the reset and pressing of the trigger). The reason is, if you wait for the “ping” on the steel, you will have delayed your response time by about a half a second or 2 outgoing / incoming rounds. I learned a long time ago while shooting on the Action Target Dueling Tree or Plate Rack that if I waited for the “ping” of my first target, my opponent was usually hitting his second, or even third target. I learned to see an acceptable sight picture for the first shot, press the trigger and immediately shift my eye focus to the second plate while muzzle of the handgun, rifle, or shotgun was still lifting.

Another, more practical reason for trusting your first shot is that in a real-life encounter, you probably won’t hear a “ping” from your adversary. You may not see any immediate reaction at all. There can be many reasons for this. First, and most likely (about 80 – 85% of the time nationally), is the possibility that you missed the threat entirely. That is why we train, train, and train some more. The second reason is that you hit, but did not hit a part of your attacker’s anatomy that would trigger an immediate reaction. (If you have the opportunity to attend one of Dr. James William’s excellent seminars, “Shooting with X-ray Vision”, do so.) The third reason may be that you hit, but the caliber / projectile configuration just didn’t perform as advertised. All of the above are good reasons for training to shoot and hit fast and repeatedly, and the quickest way to do so is to shoot on reactive steel.

In a subsequent article, I will go over how to shoot on reactive steel safely.

Sources:

  1. Bank Miller, Conscious and Subconscious Training on Reactive Steel, The Firearms Instructor, Issue 47.

Reactive Steel Shooting – Auto Popper

Reactive shooting is the skill a police officer must rely on when confronted with a suddenly hazardous situation. It is a critical skill that can save officers’ lives, and it is the result of conditioned hand-eye coordination developed by training on Action Target air-powered reactive steel systems.

As we learn more and more about the human dynamics involved in armed

confrontations, we understand that physical skills that require conscious thought or intellectual processing tend to break down rapidly under high levels of stress. If defensive skills and responses are not programmed in at a subconscious level, the sudden stress may cause us to fumble, freeze or panic. It is in this environment that reactive shooting skills are needed.

Such reflexive shooting skills can be taught through the use of extremely short time limits, thus pushing the shooter to function at the limits of reaction and response time. This can be compared to learning how to hit a fast moving ball with a bat or racket, or developing the reflexes to block a punch or kick at full speed. Reactive steel targets provide the instant feedback required to program an officer’s reflexive shooting skills effectively and efficiently.

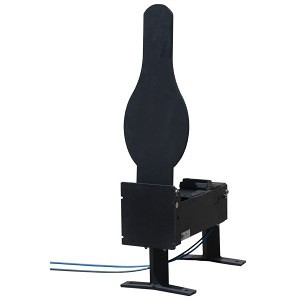
In the effort to provide more insight into Action Target’s line of Reactive Steel targets, you are presented with the Auto Popper™.

Auto Popper™

AutoPopper for Steel Targets

  • Reactive steel with automated reset
  • Multiple control options
  • Knock-down action
  • Through hardened AR500 or AR500 Brinell S
  • Multiple target head options
  • Portable or permanent installation
  • Tall or short legs

The Auto-Popper™ is an extremely versatile generalpurpose actuator that is used to lift a wide variety of targets. Instead of walking down range after each drill to reset your pepper poppers by hand, you can now reset them automatically with the just the push of a button.

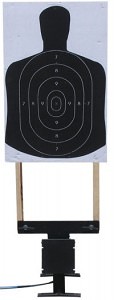
If your scenario requires something other than steel targets, you can quickly change the head attachment to a lifter arm that will accept any size paper or cardboard target. You can even configure the unit for use with military E targets or full size three dimensional targets.

You can add an optional control valve to each Auto-Popper™ for independent control over each target, or you can use a single valve to control a group of targets simultaneously.

The Auto-Popper is an adjustable actuator that lifts a steel or cardboard/plastic target into view of the shooter by remote control. The rise time of the target can vary from 0.50 seconds to 10 seconds. The power is adjustable to allow the actuator to be used with all types of handgun loads. The Auto-Popper has about 60 ft-lbs of torque in the horizontal position tapering proportionally to 0 when vertical. It can be used with steel, paper, cardboard, and large 3 dimensional targets. The Auto-Popper is capable of independent or tandem operation, it can be used with hit sensors, and it can be controlled by our SmartRange control software. The unit is self-armoring, protecting itself against bullet hits from standard handgun loads coming from a direction within +/-25 degrees of perpendicular.

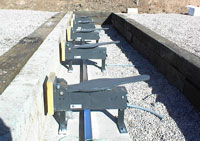
A Row of AutoPopper for Training

The Auto-Popper is pneumatic powered with a pressure operationTarget Type that Can Use AutoPoppern range of 40 psi to 100 psi. It can also be triggered by a 12V signal of less than 60mA. The actuator uses 10.6 cubic inches of air per actuation. It utilizes a “proportional force” cam lifter system to control the reset action and lift action smoothly and reliably. The Auto-Popper is totally field repairable – a complete field rebuild operation can be done by standard range personnel using standard hand tools. The target plate is reversible and easily changeable.

The actuator body and front shielding are both constructed of sandblasted and painted 3/8” armor plate steel (AR500). A lumber façade is attached to the actuator to cover the primary steel structure and prevent splatter. The hose and control wires are in a protective sheath. The hose connections use simple push-in type connectors. The actuator provides an interface to EMT carrier for simple installation. The actuator is easily mounted on any flat surface, or it can be placed on legs to elevate the target.

If you would like some more information about the Auto Popper™ or other Reactive Steel products, please contact the Territory Manager for your region.

Crucial Equipment Placement

Written by Ben Kurata

Thoughts on equipment placement, conditioned response, reaction time, Hick’s Law, the 21 foot guideline, and the OODA loop

Disclaimer 1: I do not consider myself to be an expert on any of the above topics. I am, however, really good at asking questions. I am a serious student of human behavior under stress.

Disclaimer 2: In no way what I write should be misinterpreted as passing judgment on the Officer(s) involved. In the past, I have been judged by people who were not beside me when bad things happened. I refuse to be a “Monday morning quarterback” to situations I was not involved in.

Disclaimer 3: The above title gives the reader an insight into how my mind works. I struggle on a good day to have an independent thought. I have had the privilege, however, to have trained with some absolutely brilliant thinkers / operators / teachers. I will attempt to give them the credit they deserve.

Recently, a transit Officer was convicted of homicide after he shot an individual to death while attempting to control the subject’s behavior. According to the Officer’s testimony, he thought he was reaching for his Taser but discharged his duty firearm instead, killing the subject.

Now, I am not here to pass judgment on the Officer’s actions, as I was not there. But for some time, I have recommended that Tasers be mounted on the duty belt on the non-dominant side, with the grip pointed backward, NOT in a cross-draw position. Why? Well, over the course of his / her career, a LEO may pull their handgun from its holster hundreds, maybe thousands of times during in-service training and qualification. A LE Trainer may pull a handgun from its holster tens of thousands of times.

Question:

How many times does an average LEO pull a Taser from its holster and discharge it? In most departments that I have trained with, after initial training (with its “special” videotaped moments), the only time a Taser gets pulled from its holster is when it is used on a subject. I know of no in-service or qualification live fire course of fire for the Taser.

What’s the point?

Well, many years ago, someone much wiser than I will ever be said:
“Under stress, you will revert to what you do most often or most recently.”
I only wish I could remember who told me that so I could give them credit. The point is, the dominant hand has been conditioned by hundreds (if not thousands) of repetitions to access and fire the handgun, not the Taser.

Similarly, I wish I could have a dollar for every time I saw on the range a cell phone or pager get pulled from the belt and forcibly stuffed into the magazine well of a weapon. Why? Because the operator was reverting back to the location and object on his / her duty belt that (s)he accesses most often in the course of a day – dozens of times.

Many years ago, fellow Action Target Instructor Dennis Tueller established the 21 foot guideline which has been misinterpreted over the years as the “21 foot rule”. While not diminishing the validity of what Dennis established, I can say that for the average LE Instructor (who, in theory, should be smoother and quicker at presenting the duty handgun from the duty holster) the average reactionary gap when wearing a Level II or Level III retention holster is more like 40 – 60 feet. That is with the outcome pre-determined – draw the handgun and place one or two well-placed shots on an inert practice target. Under the stress of a life -threatening attack, reaction time can double, quadruple, or deteriorate even more. Why? Well, some definitions may be useful:

Reaction Time:

“Reaction time has sometimes been described as a function of Hick’s law:
(1) H = log2(n + 1).
(2) H = Σ pi log2(1/pi + 1).
H = the information-theoretic entropy of a decision.
n = the number of equally probable alternatives.
pi = the probability of alternative i for n alternatives of unequal probability.
The time it takes to make a decision is roughly proportional to H, the entropy of the decision (the log of the number of alternatives), i.e. T = k H, where k ~ 150 msec” 1

Now, I have no idea what that means, but it may be useful in calculating the probability of getting a raise or the budget you submitted. “Entropy of the decision” is the scientific way of saying “brain cramp”! What is important to note is that formula was established by test subjects that were not being presented with life-threatening stimuli, and under ideal conditions, reaction time is a logarithmic, (12, 22, 32, etc.) not an arithmetic (1 + 1, 2 + 1, etc.) variable.

Now, how many use of force options does the average Officer have?

  1. Presence;
  2. Verbal instructions / commands;
  3. Empty hand techniques;
  4. Aerosol spray;
  5. Baton;
  6. Taser;
  7. Radio;
  8. Lethal force, which can include:
    1. Handgun;
    2. Folding knife;
    3. Baton, if targeted on “red” areas of the anatomy;
    4. Shotgun;
    5. Patrol Rifle;
    6. Improvised weapons (“Bumper – 06”);
    7. Etc.

And, let us not forget that word that has been pounded into every Officer’s head (and we have to share the responsibility for this one): Liability.

Now, let’s add the one factor that throws almost all probability theory out the window: Life – threatening stimuli.

A concept which may be more useful in understanding actual reaction time under life – threatening circumstances may be USAF Lt. Col. (Ret.) John Boyd’s OODA loop. It is not my intention here to recap my understanding of the OODA loop. (For an excellent summary, please locate and read Ken Good’s article, “Got a Second? Boyd’s OODA Cycle in the Close Quarter Battle Environment”.) Suffice it to say that after being in and running a few force-on-force simulations, most people (including myself) make mistakes in the initial Observation phase and then get caught in what Ken Murray describes as a “goofy loop” 2 – unable to make an appropriate decision as to what to do next. Or, caught on the reaction (wrong) side of the action / reaction curve.

So What?

Well, let me just throw this out for thought:

  • All less lethal tools (including radio, pager, and cell phone) on the non – dominant side of the duty belt / LBE, etc., accessed and practiced with the non-dominant hand.
  • All lethal force tools on the dominant side of the duty belt, accessed and practiced with the dominant hand.

Now, please don’t misinterpret me. I am not saying to stop practicing wounded / disabled drills. Now, more than ever, I practice accessing, shooting, reloading, and clearing stoppages with the non – dominant hand AND EYE only. It all boils down to, “Under stress, you will revert to what you do most often or most recently.”

(If you are the trainer who said that to me many years ago, please contact me so that I can give you proper credit.)

Notes:

1.   https://www.usabilityfirst.com/glossary/hicks-law/
2.   Kenneth R. Murray, “Training at the Speed of Life, Volume 1”, copyright Armiger Publications, 2004.
Dueling Tree and Torso

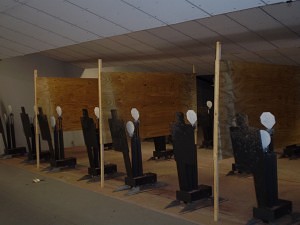
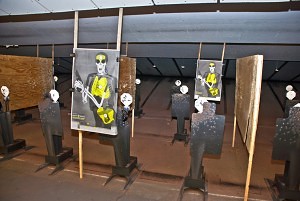
This is one of the best deals we have offered to date. Action Target is offering their Dueling Tree (AR500) and Standard Torso targets for only $500. That is about $120 off MSRP.

AT Dueling Tree AR550

AT Torso

Enter Promotional Code: DTANDT500 in the payment section to receive your discount.

This offer is available at the Action Target Store or by contacting the Territory Manager for your area.

OFFER EXPIRES JANUARY 5, 2011

1000 Paper Targets

How do you improve on the paper targets ? You set a new standard. Action Target has adopted a new material which is quickly becoming the preferred option for targets among law enforcement agencies throughout the US.

Here is a list of the key improvements our cardstock targets offer:

  • Less expensive than paper targets
  • Twice the thickness of regular paper targets
  • Base coating keeps fibers from exploding outward
  • Every shot can easily be identified
  • Water resistant
  • Tear resistant
  • Will not roll up during shipping
  • Comes in specially designed boxes that allow for easy target identification and storage

Shoot our targets, wet or dry, and you will quickly understand why our target material is becoming the new standard in the industry. Try it now with our special offer of 1000 B21E with blue or black images (shown) for only $0.18/each. It is time to stop shooting on the paper targets of yesterday!

Enter Promotional Code: STANDARD in the payment section to receive your discount.

This offer is available at the Action Target Store or by contacting the Territory Manager for your area.

OFFER EXPIRES DECEMBER 30, 2010

Enhance Training Realism

Be honest. How many people reading this have attended or even taught a training course where you have used 2’X4” pieces of lumber to outline a room? How many of you have used this wood-outlined configuration for dynamic or static entry training? What about searching rooms outlined by strips of wood? These concepts are good at building on classroom instruction and enhancing the fundamentals necessary for entry and clearing. But is it great? Realistic?

Don’t worry, we both know the answers.

It is time to demand more out of training. The list of “props” that have been used by law enforcement and the military in training to add realism would take too much time to list. The days of telling an academy recruit, “Now simulate these pieces of wood are a room and this is the door,” are over. The technology of today allows us to have better training materials. Current technology allows us to have more realism added to our training scenarios. It allows us to train in controlled settings that are as real as possible without actually being in a free-standing structure, which has been vacated for your coursework.

There is nothing wrong with conducting your training in a real building. Personally, in the past I have run my recruits to several locations in various cities for them to get the most realistic training possible. If your organization is lucky enough to have established relationships with businesses, warehouses, apartment buildings and private homes, then you know just how challenging having a training course in those locations can be. It takes a significant amount of time and effort to set training dates, coordinate with all parties involved, ensure your class know the location, have enough parking space, obtain approval from the neighbors and/or city if necessary. Wouldn’t it be much easier to have training that encompasses all of those types listed in a single structure?

Of course! It would be great to have that type of capability in a single location. Is it possible and is it cost effective? Those are the key questions. And, by the way, the answer is yes, it is!

The days of training our first responders, SWAT, corrections and military personnel with the most realistic and safe training using only one building are here! The answer can be found with Action Target and our newest product, FlexTact®. Action Target has recently partnered with Hufcor to be the Exclusive World Wide vendor for their FlexTact® movable wall training system.

The FlexTact® system is currently used for non-live fire training only. Since non-live fire training can really be conducted anywhere, what is so great about this system? It’s simple. The system can be completely be reconfigured within minutes. For example, in a matter of a few minutes, you can transform your office scenario to a warehouse then into a residential setting. If you need to serve a high risk warrant and want to realistically structure your breach training, the physical layout of the residence can be duplicated with the FlexTact system.

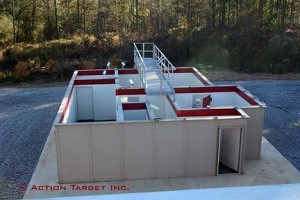
Since FlexTact® is only available from Action Target, we have been receiving requests from all areas of the world on how to incorporate this revolutionary training system into a new building or existing structure. The great aspect of FlexTact® is that it can be placed in either! Those interested in FlexTact® are from the commercial, military and law enforcement communities. The FlexTact® system compliments our core expertise in live fire ranges and shoot houses such as the M.A.T.C.H. (Modular Armored Tactical Combat House) live fire structure shown below.

Top View of FlexTract Training SystemThe FlexTact® system employs the following:
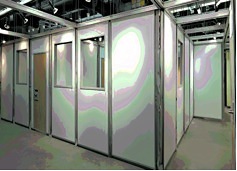
  • Rugged 16 ga. welded steel frames resist impacts
  • High Pressure Laminate surfaces are easy to clean and resist impacts
  • Quickset bottom seals hold walls in place during exercises
  • Overhead architectural aluminum tracks allow panels to move smoothly and quickly into place
  • Side bulb seals allow panels to be configured quickly
  • Specially designed passdoors for entry exercises.
  • Optional window inserts and glass walls panels for diversified training scenarios.

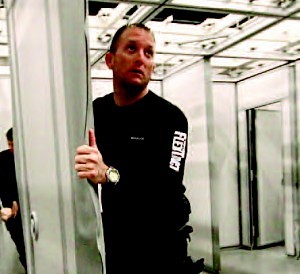
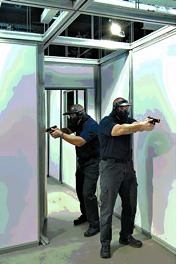
FlexTract Moveable Training SystemPlease notice from the picture that everything is suspended from above. There are no grooves in the floor, which means there are no tripping hazards. The FlexTact® system has an overhead railing system built on a grid pattern that can be self-sustaining or tied into the existing beams of a building. The panels can be moved quickly and set onto the floor with rubber feet that keep them in place. These panels accommodate full impact breach doors for entry training. They have frangible window options that can be struck with shotgun less than lethal rounds, training with explosives like Stingball Grenades or Flash Bang technology.
In addition to those already listed, you can enhance the realism of FlexTact® even further with the following options:

  • Low light / No light capability
  • Doors with handles that actually shut
  • Wall graphics for custom scenes / murals
  • Standing targets
  • Foam furniture / props

This system has already been installed and used in many locations. It has been used by more than just law enforcement and military. This technology allows for firefighter training by filling the structure with smoke and having to search. Fire Departments from local, state and federal agencies are discovering the multiple uses for FlexTact®. They are also finding it is easier to obtain funding for a training structure that can be used for multiple purposes.

Man Training in FlexTract Training SystemImagine having a 40’x40′ room, like a typical gymnasium. It is a big box with a wooden floor. How many of you have a room like this somewhere? I would bet that most of you have something similar that is the property of your agency. What is that space being used for? Storage? Offices? Mat room for Arrest Techniques / Defensive Tactics? Classroom? Now imaging having all of those capabilities in just one room! With FlexTact®, you can quickly reconfigure that room into anything that supports your training needs.
This is the most revolutionary new product for public safety training! The capabilities are so substantial, that it warrants a further look. Action Target welcomes you to review it for yourself. Here is the FlexTact® Brochure for you to review.

Two Shooters Training in FlexTract Training SystemTake a look and you will see that FlexTact® will meet your training needs and can be placed in almost any existing building or incorporated into new builds. If you have a project currently underway and want FlexTact® installed, our lead time is as little as (5) five weeks from design approval to installation!

You will not find a better option for a realistic structure that can be used for such diverse applications. As the industry leader, Action Target asks you to contact us today to learn how we and the FlexTact® system can support your training needs. Enhance your training realism today with FlexTact® by contacting Action Target!

To learn more about Action Target and its full line of products, please visit www.actiontarget.com. For additional information on Tactical Breaching Door technology, please contact one of our Action Target Representatives, Law Enforcement & Commercial, Federal, Military or International.

Function Testing Long Guns (Part Two)

Written by Benjamin Kurata

*This is the second entry in a 2-part series on Long Gun Function Testing. The first entry was published two weeks earlier.

In a previous article, I covered function testing the AR-15 / M4 patrol rifle and variants. Now, let’s turn to that old standby of the police arsenal, the 12 gauge pump shotgun. It’s a common misconception that the 12 gauge pump shotgun is maintenance free. Certainly, the majority of shotguns I’ve seen were evidence of this misguided belief. The police shotgun has to be routinely cleaned, lubricated and function tested the same as any other duty weapon. One area that most shooters overlook when cleaning and lubricating the police shotgun is the magazine tube. The tube is made of steel, and the magazine spring and shell follower are made of steel. (If the shell follower in your shotgun is a thin plastic cap, discard it and get the steel one. If the plastic cap breaks inside the magazine tube, you’ll have to put the shotgun on to the workbench to get it to work again.) When the shotgun is carried in “cruiser carry” mode, the magazine spring is compressed against the interior of the magazine tube. Let some moisture get into the magazine tube, and corrosion of magazine spring can occur.

Whenever I disassemble, clean, lubricate and function test my shotgun, I push a bore brush and patches wet with solvent through the magazine tube until the patches come out clean. I finish up with a clean patch moistened with lubricant followed by a clean, dry patch. A wipe down of the magazine spring with some lubricant completes the maintenance on the magazine tube.

Function Testing of the Pump Shotgun:

  1. Make certain that there is no live ammunition in the magazine tube or chamber. With the bolt back, a quick physical check through the loading port by touching the magazine follower and the empty chamber gets the task done.
  2. Pump the fore end all the way forward. Try to pull the fore end back. The fore end and bolt should remain locked forward.
  3. Put the safety on “Safe”. Press the trigger, hard. Nothing should happen.
  4. Point the muzzle in a safe direction and press the trigger. You should feel / hear a normal hammer fall. Keep the trigger depressed.
  5. With the trigger depressed, roll the shotgun sideways so you can look through the ejection port. Slowly work the fore end all the way back and then forward. You should see the shell lifter rise up when you start the fore end forward. Continue to push the fore end all the way forward while keeping the trigger depressed.
  6. Slowly let the trigger forward until you feel and hear the disconnector reset. It won’t take much forward motion of the trigger, and the reset will be subtle. The reset on my personal Remington 870 feels about the same as my 1911A1 Colt. Yes, all modern pump shotguns since the model 1897 Winchester have disconnectors.
  7. Press the trigger again. You function test is now complete.

Function Testing the Police Semiautomatic Shotgun:

  1. Make certain that there is no live ammunition in the magazine tube or chamber. With the bolt back, a quick physical check through the loading port or the ejection port by touching the magazine follower and the empty chamber gets the task done.
  2. Let the bolt go forward by pressing the bolt release button. The bolt should move forward sharply and lock into the rear of the barrel.
  3. Point the muzzle in a safe direction and put the safety on “Safe”. Press the trigger, hard. Nothing should happen.
  4. Point the muzzle in a safe direction and press the trigger. You should feel / hear a normal hammer fall. Keep the trigger depressed.
  5. With the trigger depressed, roll the shotgun sideways so you can look through the ejection port. Slowly pull the charging handle to the rear with your non-dominant hand and ease it slowly forward. As the bolt starts forward, you should see the shell lifter rise up. Work the charging handle back and forth a few times. You shouldn’t feel any unusual binding, just slight resistance when the bolt unlocks and a slight “bump” as the bolt body passes over the hammer.
  6. Pull the charging handle all the way back and let it fly forward.
  7. Slowly let the trigger forward until you hear and feel the disconnector reset. Again, this won’t take much forward motion of the trigger and is subtle (compared to the disconnector reset on say, an AR-15).
  8. Press the trigger again. Your function test is now complete.